
Post by admin on Oct 4, 2006 10:41:58 GMT -5
SGB Galactic Marine fiberglass helmet kit
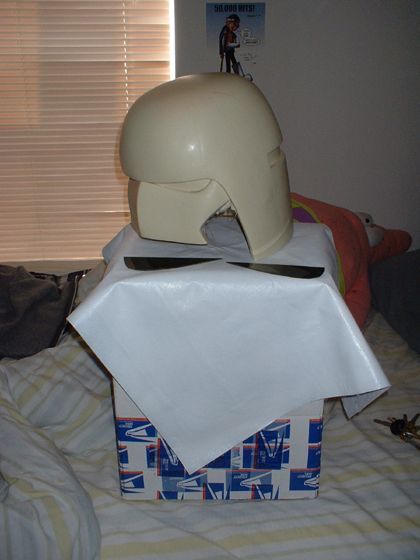
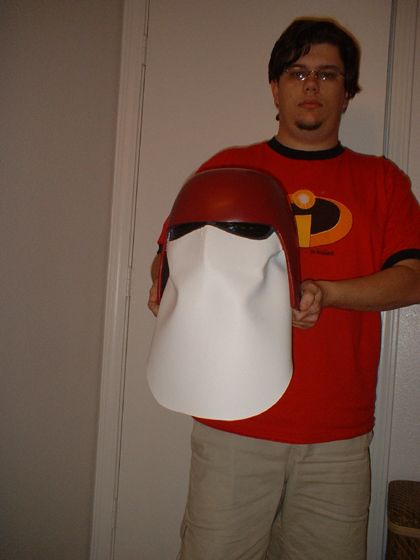
First up is the wonderful GM helmet I got from SGB. This helmet came to me in kit form, and being that it was my first ever fiberglass helmet, I wanted to spend some time with it. It came just as you see it below, fresh out of the mold with all the necessary parts. However, as you will learn momentarily, the fabric included with my kit was far too small of an amount for this helmet. The cowl is supposed to wrap around the entire inside of the helmet, and the amount of fabric included in my kit only covered the face. SGB and I have already discussed that, so he may be shipping more material for current and future orders. I can't speak on that though.
Photo showing helmet right out of the box.
So the first thing I wanted to do was load up on supplies. I had an idea of what I wanted to do with this helmet even before I got it, so I gathered my supplies according to what I was going to do with it. Here is a list of supplies I got for my helmet:
Supplies needed:
Black wire mesh (Home Depot or equivilent)
Hot glue and gun (Hobby Lobby or equivilent)
2x PC fans (Radio Shack)
9v battery hookup (Radio Shack)
Wires for fans (Radio Shack)
1 yard of white marine-quality vinyl (fabric store)
Super glue (Wal-Mart)
Epoxy glue (Wal-Mart)
Tools needed:
Sandpaper (various grits)
Heatgun, hairdryer, or open coil stove (eek!)
Dremel or other rotary tool with grinding/sanding bits and rotary bit
Paint needed:
Primer of your choice (I used white Krylon primer, I believe)
Krylon Satin Burgundy
Dark gray acryllic brush-on paint
So when I had my supplies on-hand, I started on the helmet. First thing's first - you have to wash the helmet off. There may be a slight tacky coating to the helmet, this is the mold release still on the gel-coat, and it must be washed off. I also used a spare toothbrush that I keep in my tool box to really scrub away at the corners and low spots of the helmet. After washing the beast, I took a dremel to it to grind out some of the flash on the inside bottom edges of the helmet. This is where the resin and fiberglass met the edge of the mold, forming a harsh, jagged edge. I spent a few hours grinding this smooth with various bits: Grinding bits work best, but for some of the tough spots, I even used a rough-grit sanding drum or even the cutter wheels. There's no specific method, really. Once that was complete, I cut out the eyes with the rotary bit (and also the back vent). WORK SLOW! These rotary bits can tear up resin and fiberglass. In fact, most of the time I prefer just using a drill bit because it won't tear through the material as fast. After all your cutting work is done, sand all the edges down. Then sand the entire helmet. I only found it necessary to lightly sand the outside of the helmet with some fine-grit sandpaper. The face part I sanded with a really rough grit sandpaper. You'll be gluing to this later, so I thought it best ot really rough it up.
Photo showing the helmet sanded down with a first coat of primer.
Once it's all sanded, you may prime the helmet. A light first coat is all you need if you're going to be doing any filling. However, at the time I built the helmet, I had no experience in working with Bondo, so I skipped the step. The helmet would later be heavily weathered, so I didn't even think it was necessary in the first place. IF you skip this step, you may prime it for paint. I didn't prime the entire face portion, I only got around the eyes. But prime everything else. Sand it down with some fine grit sand paper, and then reprime it. Now it's ready for paint, but stop there!
This is where I test fitted some of the components. I went ahead and cut two small sheets of black wire mesh to about an inch larger than the vent (on all sizes), and mocked them up in place with some tape. I also formed the eye pieces here as well. I used my stove to do this, but I would much rather have liked to have used a heat gun if I had one available. First, you'll need to heat each piece independantly and form it to the curve of the helmet. Just heat it up and press it in the inside of the helmet. Once that's done for both pieces, lay them in place and you'll notice that each piece needs to be trimmed on the inner edges (mine were overlapping). Do so now. Now's the second most-trickiest part of the entire helmet. Use a padded glove (I used an oven mit) and heat up the lense, quickly put it in place, and push your fingers on it from the inside to bubble out the eyes. On mine, I accidentally dropped one of the lenses ON the coil of my stove, and it sort of heat-chipped it in some place. At first I was mad at myself, but then I figured... Why would there be all these dirty troopers with pristine lenses? Don't the lenses get dirty and damaged? They should, I thought, so I kept it like that as battle damage. Finally, I mocked these in place too to see how it would look.
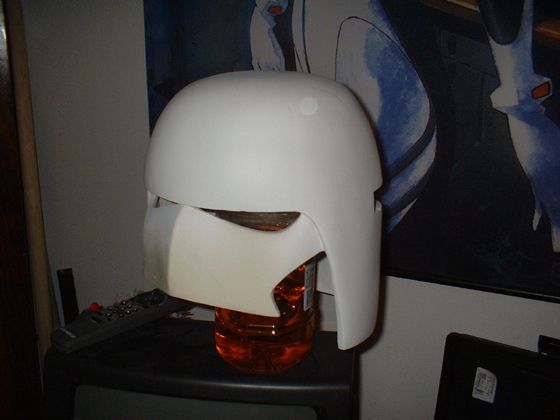
Photo showing the lenses bubbled out and mocked in place.

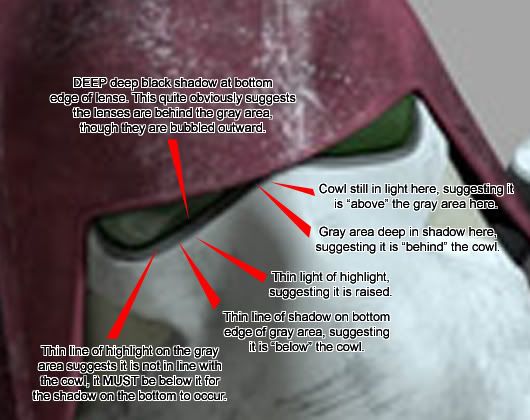
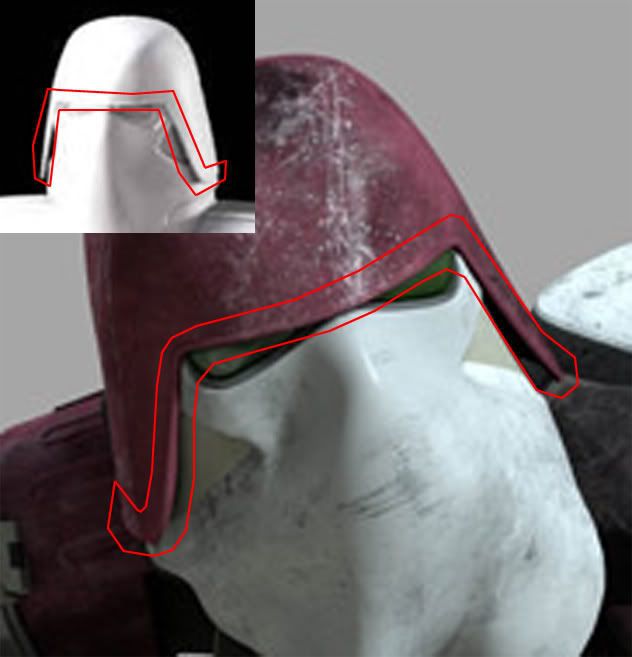
Now it's ready to paint. Prime it again if you feel it's necessary. Once you're ready, paint the dome of the helmet (ie, the whole helmet sans the face) with the Krylon Satin Burgundy. Be sure to paint the insides of all the edges, vents, and eyes too. Give it several coats (mine took three). Once dry, brush in the dark gray paint under the eyes. You'll be leaving a good 1/4" to 1/2" of this EXPOSED when it's time for the vinyl (as per the first "Sith Snapshot" reference image).
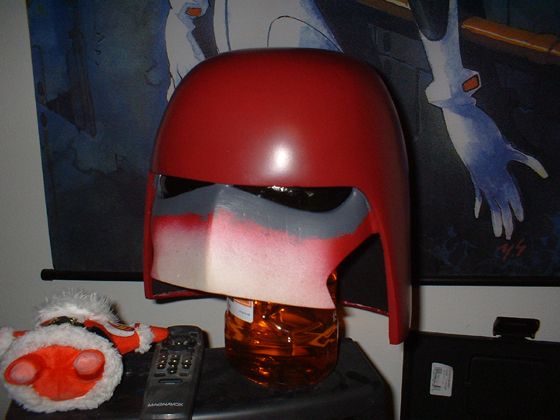
Photo showing helmet painted per notes above. Also shows foam interior starting to take shape - an unnecessary step I chose to take to give my helmet something extra.
Once it's painted, glue in the eyes and vent with hot glue.
This next step is perhaps the hardest part of the entire helmet. It involves dealing with complex curves and stretching the vinyl to meet those curves. The cowl was done in two halves: front and back. I started with the front. First, I decided how far down the chest my vinyl will go, so I measured the vinyl from the eyes of the helmet down to that point, adding a few inches for cutting later on. Then I measured the circumference of the helmet around the bottom of the face, again adding several inches for play. With these dimensions, I cut a large rectangle and marked the vertical center of it for future reference. Now, starting with that center line, I began gluing the vinyl to the face. I used the super glue as I knew it would set quickly so I could work faster. As I said, I started with the center line. Moving down each cheek, I glued a good inch or so from the eyes, as I knew I would be cutting this area and gluing it later. As I went into each corner, I took a razor blade and cut it as I jammed the fabric into the corners, that way it glues in how it's supposed to lay. Getting it into the cheek recesses was very tricky. I decided only to glue it to the TOP side of the recess, NOT the side part it. This prevented that little sharp edge from poking through and making it look weird. However, to glue to the recess, I didn't use super glue. I used the epoxy glue. I did NOT want this coming loose at all. Once I was done with the one side, I left the remainder of that side unglued to the inside of the helmet, and I did the same thing to the other side.
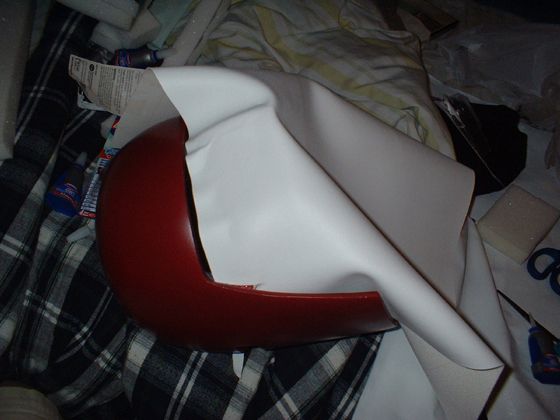
Photo showing the face material going on.
Once the face portion of the vinyl was complete, the back part would be a breeze. It only took a little playing with the measurements, but it essentially was just a small rectangle glued in to the insides. I then glued the remaining unglued portions of the front part to the back part, and then glued it to the helmet. Now we cut. I started with the eye part. Keeping note of the curve of the face and where the eyes where, I slowly starting slicing my way around the eye piece. I got it down to about a half inch away from the eyes, and glued it down. You've just completed the hardest part the helmet. Now just take some scissors to the bottom edge of the vinyl and cut it to your desired length and shape, and voila - you're done with the outside of the helmet.
Now we turn our attention to the inside of the helmet. The first thing I wanted to do was to get some air moving around in it. There's only one vent on this thing, and I wanted to get the air moving in and out of it. So I glued in some PC fans at the sides of the vent, both pulling air into the helmet. I wired it to a switch and battery that were stored on the inside of the face plate. I w rapped all my wire connections in electrical tape to keep them together. Everything was simply hot glued into place. Finally, I glued in some foam padding to lift it off my head. The helmet doesn't need to come too far off your head, much like a Fett helmet. This works fine if you're going to put it on a mannequin, but as I learned with my recent photo shoot, this helmet is very front-heavy and requires something extra. I'm currently considering taking all the padding out and going with a hardhat liner with a chin strap.
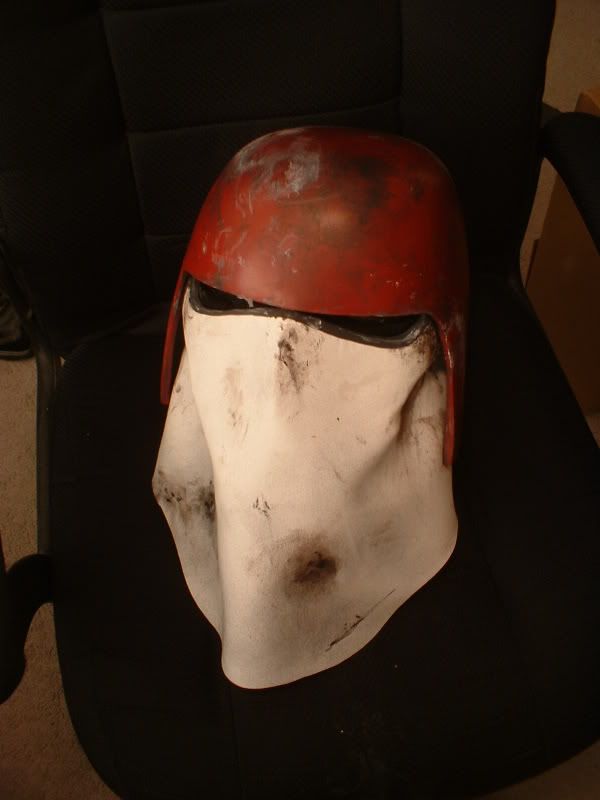
Aside from how you wish to do your lining, the helmet is complete. I save my weathering for last, when I could weather it with the rest of the armor.
Photo showing completed helmet interior.
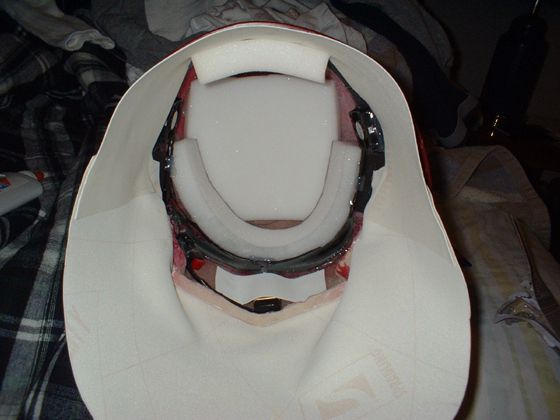
Photo showing completed helmet with weathering.
First up is the wonderful GM helmet I got from SGB. This helmet came to me in kit form, and being that it was my first ever fiberglass helmet, I wanted to spend some time with it. It came just as you see it below, fresh out of the mold with all the necessary parts. However, as you will learn momentarily, the fabric included with my kit was far too small of an amount for this helmet. The cowl is supposed to wrap around the entire inside of the helmet, and the amount of fabric included in my kit only covered the face. SGB and I have already discussed that, so he may be shipping more material for current and future orders. I can't speak on that though.
Photo showing helmet right out of the box.
So the first thing I wanted to do was load up on supplies. I had an idea of what I wanted to do with this helmet even before I got it, so I gathered my supplies according to what I was going to do with it. Here is a list of supplies I got for my helmet:
Supplies needed:
Black wire mesh (Home Depot or equivilent)
Hot glue and gun (Hobby Lobby or equivilent)
2x PC fans (Radio Shack)
9v battery hookup (Radio Shack)
Wires for fans (Radio Shack)
1 yard of white marine-quality vinyl (fabric store)
Super glue (Wal-Mart)
Epoxy glue (Wal-Mart)
Tools needed:
Sandpaper (various grits)
Heatgun, hairdryer, or open coil stove (eek!)
Dremel or other rotary tool with grinding/sanding bits and rotary bit
Paint needed:
Primer of your choice (I used white Krylon primer, I believe)
Krylon Satin Burgundy
Dark gray acryllic brush-on paint
So when I had my supplies on-hand, I started on the helmet. First thing's first - you have to wash the helmet off. There may be a slight tacky coating to the helmet, this is the mold release still on the gel-coat, and it must be washed off. I also used a spare toothbrush that I keep in my tool box to really scrub away at the corners and low spots of the helmet. After washing the beast, I took a dremel to it to grind out some of the flash on the inside bottom edges of the helmet. This is where the resin and fiberglass met the edge of the mold, forming a harsh, jagged edge. I spent a few hours grinding this smooth with various bits: Grinding bits work best, but for some of the tough spots, I even used a rough-grit sanding drum or even the cutter wheels. There's no specific method, really. Once that was complete, I cut out the eyes with the rotary bit (and also the back vent). WORK SLOW! These rotary bits can tear up resin and fiberglass. In fact, most of the time I prefer just using a drill bit because it won't tear through the material as fast. After all your cutting work is done, sand all the edges down. Then sand the entire helmet. I only found it necessary to lightly sand the outside of the helmet with some fine-grit sandpaper. The face part I sanded with a really rough grit sandpaper. You'll be gluing to this later, so I thought it best ot really rough it up.
Photo showing the helmet sanded down with a first coat of primer.
Once it's all sanded, you may prime the helmet. A light first coat is all you need if you're going to be doing any filling. However, at the time I built the helmet, I had no experience in working with Bondo, so I skipped the step. The helmet would later be heavily weathered, so I didn't even think it was necessary in the first place. IF you skip this step, you may prime it for paint. I didn't prime the entire face portion, I only got around the eyes. But prime everything else. Sand it down with some fine grit sand paper, and then reprime it. Now it's ready for paint, but stop there!
This is where I test fitted some of the components. I went ahead and cut two small sheets of black wire mesh to about an inch larger than the vent (on all sizes), and mocked them up in place with some tape. I also formed the eye pieces here as well. I used my stove to do this, but I would much rather have liked to have used a heat gun if I had one available. First, you'll need to heat each piece independantly and form it to the curve of the helmet. Just heat it up and press it in the inside of the helmet. Once that's done for both pieces, lay them in place and you'll notice that each piece needs to be trimmed on the inner edges (mine were overlapping). Do so now. Now's the second most-trickiest part of the entire helmet. Use a padded glove (I used an oven mit) and heat up the lense, quickly put it in place, and push your fingers on it from the inside to bubble out the eyes. On mine, I accidentally dropped one of the lenses ON the coil of my stove, and it sort of heat-chipped it in some place. At first I was mad at myself, but then I figured... Why would there be all these dirty troopers with pristine lenses? Don't the lenses get dirty and damaged? They should, I thought, so I kept it like that as battle damage. Finally, I mocked these in place too to see how it would look.
Photo showing the lenses bubbled out and mocked in place.
Now it's ready to paint. Prime it again if you feel it's necessary. Once you're ready, paint the dome of the helmet (ie, the whole helmet sans the face) with the Krylon Satin Burgundy. Be sure to paint the insides of all the edges, vents, and eyes too. Give it several coats (mine took three). Once dry, brush in the dark gray paint under the eyes. You'll be leaving a good 1/4" to 1/2" of this EXPOSED when it's time for the vinyl (as per the first "Sith Snapshot" reference image).
Photo showing helmet painted per notes above. Also shows foam interior starting to take shape - an unnecessary step I chose to take to give my helmet something extra.
Once it's painted, glue in the eyes and vent with hot glue.
This next step is perhaps the hardest part of the entire helmet. It involves dealing with complex curves and stretching the vinyl to meet those curves. The cowl was done in two halves: front and back. I started with the front. First, I decided how far down the chest my vinyl will go, so I measured the vinyl from the eyes of the helmet down to that point, adding a few inches for cutting later on. Then I measured the circumference of the helmet around the bottom of the face, again adding several inches for play. With these dimensions, I cut a large rectangle and marked the vertical center of it for future reference. Now, starting with that center line, I began gluing the vinyl to the face. I used the super glue as I knew it would set quickly so I could work faster. As I said, I started with the center line. Moving down each cheek, I glued a good inch or so from the eyes, as I knew I would be cutting this area and gluing it later. As I went into each corner, I took a razor blade and cut it as I jammed the fabric into the corners, that way it glues in how it's supposed to lay. Getting it into the cheek recesses was very tricky. I decided only to glue it to the TOP side of the recess, NOT the side part it. This prevented that little sharp edge from poking through and making it look weird. However, to glue to the recess, I didn't use super glue. I used the epoxy glue. I did NOT want this coming loose at all. Once I was done with the one side, I left the remainder of that side unglued to the inside of the helmet, and I did the same thing to the other side.
Photo showing the face material going on.
Once the face portion of the vinyl was complete, the back part would be a breeze. It only took a little playing with the measurements, but it essentially was just a small rectangle glued in to the insides. I then glued the remaining unglued portions of the front part to the back part, and then glued it to the helmet. Now we cut. I started with the eye part. Keeping note of the curve of the face and where the eyes where, I slowly starting slicing my way around the eye piece. I got it down to about a half inch away from the eyes, and glued it down. You've just completed the hardest part the helmet. Now just take some scissors to the bottom edge of the vinyl and cut it to your desired length and shape, and voila - you're done with the outside of the helmet.
Now we turn our attention to the inside of the helmet. The first thing I wanted to do was to get some air moving around in it. There's only one vent on this thing, and I wanted to get the air moving in and out of it. So I glued in some PC fans at the sides of the vent, both pulling air into the helmet. I wired it to a switch and battery that were stored on the inside of the face plate. I w rapped all my wire connections in electrical tape to keep them together. Everything was simply hot glued into place. Finally, I glued in some foam padding to lift it off my head. The helmet doesn't need to come too far off your head, much like a Fett helmet. This works fine if you're going to put it on a mannequin, but as I learned with my recent photo shoot, this helmet is very front-heavy and requires something extra. I'm currently considering taking all the padding out and going with a hardhat liner with a chin strap.
Aside from how you wish to do your lining, the helmet is complete. I save my weathering for last, when I could weather it with the rest of the armor.
Photo showing completed helmet interior.
Photo showing completed helmet with weathering.


 It was worth a try.