|
|
Post by pghfett on Feb 4, 2007 1:51:48 GMT -5
Not a rant at all !  Chinese proverb: One generation plants the trees; another gets the shade. |
|
|
|
Post by mandoman on Feb 4, 2007 2:00:44 GMT -5
Yep, I love being a part of this community. With constant discoveries and all the new stuff being made, this is a great time to be involved in this. My GM will probably become my favorite costume, mostly because of the good experiences I've had with the people involved in it. |
|
Deleted
Deleted Member
Posts: 0
|
Post by Deleted on Feb 4, 2007 2:04:39 GMT -5
same here...I can just feel it now...Everytime I look at my laws chest plate (the only GM piece I have so far (...tear...) I just hear my subconscious saying "that suit is gonna be my pride and joy"...I mean, I ALWAYS liked the snow troopers better than TKs and TBs, but this is EVEN COOLER than snow troopers...It's hard to believe that (chronologically) TS's are the UP-grade to the GM's, isn't it? I mean, TS's don't even have their shoes tied...  |
|
|
|
Post by admin on Feb 4, 2007 2:07:27 GMT -5
Ok back on topic maggots! The new chest plate is now ready for paint! However, I'm gonna hold off on painting it until I mold up these chest greeblies. I'm going to mold them up WHILE they are on the chest plate (instead of removing them for molding). So I'll have to build up a clay dam to pour the rubber in, and then remove that and clean it up, so it probably won't get painted for at least a week. 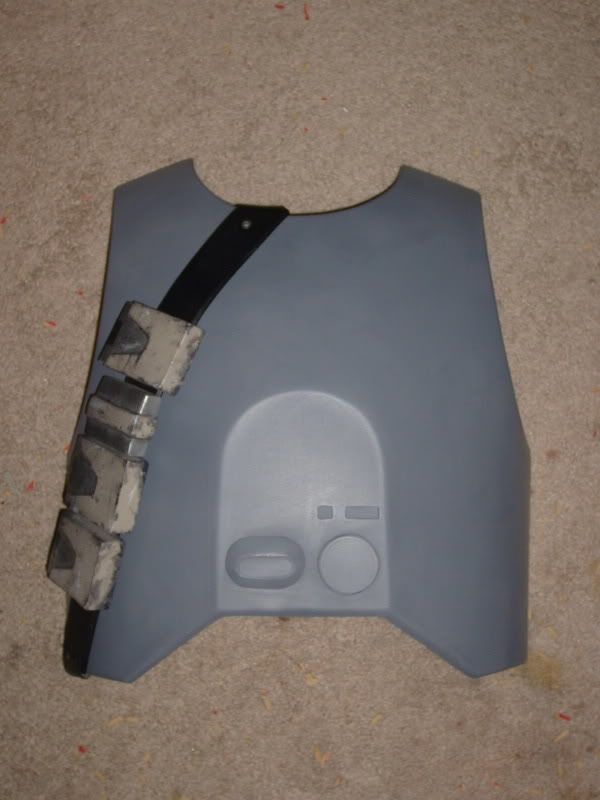 But I also did some test fitting. I went back to the basics with some industrial-strength adhesive-backed velcro. A week or so ago, when I was working on my updated Biker Scout, I noticed that I had NEVER had to change the velcro on it... the industrial-strength velcro held up wonderfully! I so I decided to buy some for use on the chest. I did some test fitting, and this stuff is great! It holds even stronger than the sew-on stuff that I glued on to the old chest plate! 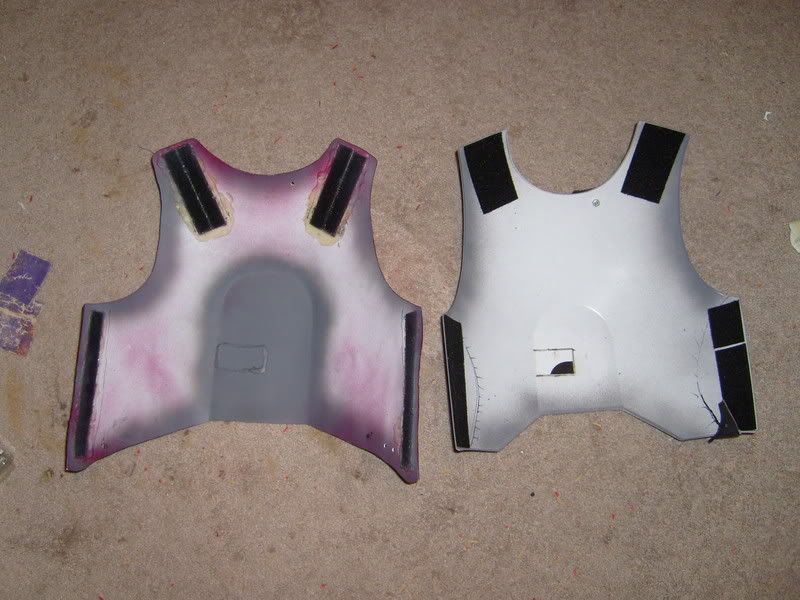 Test fitting it, I initially thought I'd have to shave off the bottom of the backplate/rib armor setup. But I found that I could just lower the chest so the bottom edges would meet up, and there is now no need to do so. However, I WILL need to shave off the arm hole area on the backplate to make it smoother.  While I had the chest setup still on, I decided to see what the backpack would look like if I raised the harness so that the straps would come out over the top of the backplate, and here are the results. I really like how far it raises the backpack, so I'm gonna go ahead and make those mods to my harness to get it up that high.  |
|
Deleted
Deleted Member
Posts: 0
|
Post by Deleted on Feb 4, 2007 2:10:34 GMT -5
sweet setup there captain...The backpack DOES look better a little higher up...(I think you might have mentioned something about this before) Are you going to get a new backplate or are you going to mod your current one so it lines up with your new chest plate? I can't imagine that you are one to just say "screw it", but maybe I am wrong here...
|
|
|
|
Post by admin on Feb 4, 2007 2:14:10 GMT -5
I'm going to mod this backplate so I can use it for the time being. However, the shoulders are spread a little wide for the new chest plate, but I made it work. I do want to get a new backplate though, to better compliment the mrlaws chest plate, and so I have an overall better presentation for when I get to working on the Ferin outfit. I'm considering the JM backplate.
|
|
Deleted
Deleted Member
Posts: 0
|
Post by Deleted on Feb 4, 2007 2:17:51 GMT -5
I ordered a set of JM phase I armor (with EP II bucket)...And depending on how well the backplate matches up to laws chest plate, I may order another from him for my GM...However, if the JM backplate DOES NOT match up quite right, I have a friend who does vacuumforming and stuff like that who said I can send him the backplate and he will recast it basically (I got the ok from JM and him to recast) to fit the GM chest plate perfectly...Basically, it will be MADE for the chest plate and look like it, instead of looking like it was modded (not that there's anything wrong with that)...
|
|
|
|
Post by admin on Feb 4, 2007 2:25:40 GMT -5
Yeah, there's not much to modding it. It's basically just taking a pair of tin snips or a dremel to the bottom edge so the sides mate up. I wouldn't even bother going through to motions of using all that plaster to make another negative just for one other piece. I'd say, just get another JM if it looks like an easy cutting job, and then just cut the sucker! PS. Hint hint. The term "recasting" typically has a negative connotation attached to it, bad juju if you will. So even if it's just a copy for your own purposes, I'd leave the process off the boards for the sake of avoiding trouble. Just a friendly tip. And as of this note, this will be the last time it's discussed here, I don't want this turning into a thread about artisit ethics. |
|
|
|
Post by admin on Feb 4, 2007 16:03:21 GMT -5
This morning I went ahead and built up the clay dam on the chest plate, and about 20 minutes ago, I finished pouring the rubber in. Like Mike always tells me, I put some cloth on the outer layer and covered it with more rubber. I used a potato-sack material, so its a really thick, really airy weave, so the rubber will soak right in. It should be fully cured around 7:00pm tonight! 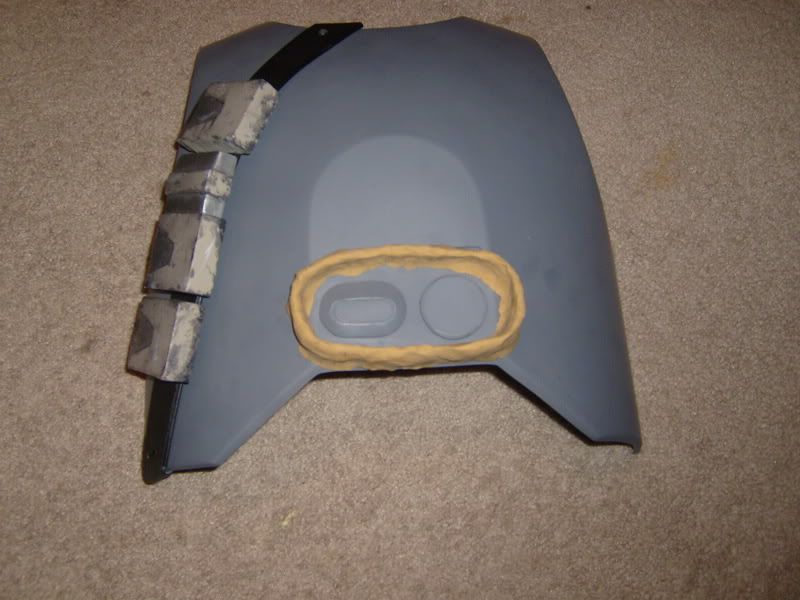 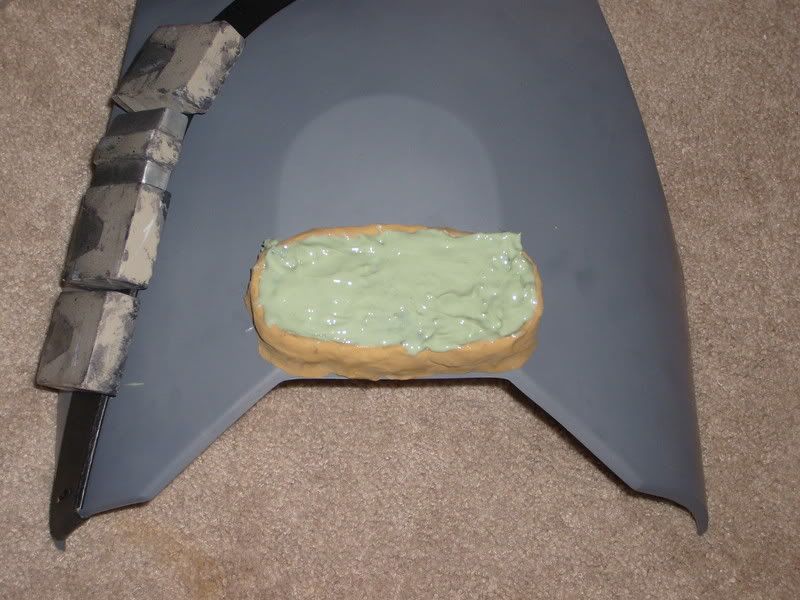 |
|
|
|
Post by mandoman on Feb 4, 2007 16:26:49 GMT -5
Looking good, Captain! That stuff will clean off no problem, right? Don't want it doing anything to your chestplate.
|
|
|
|
Post by admin on Feb 4, 2007 22:53:54 GMT -5
Guess what boys? Mold is done! I start pouring resin tomorrow! 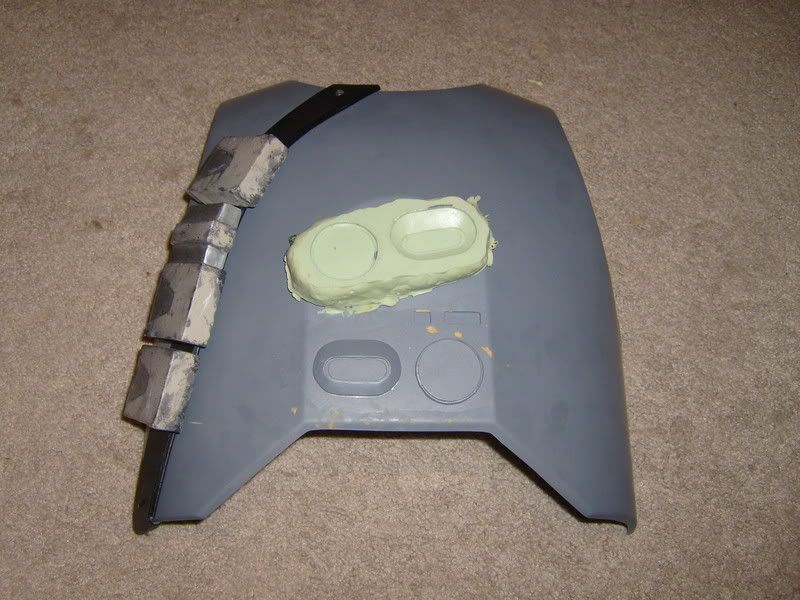 |
|
Deleted
Deleted Member
Posts: 0
|
Post by Deleted on Feb 4, 2007 23:20:29 GMT -5
sweet...No matter how many costumes I do (will do actually) or how many times I see pics of how things are done, the process of vacuumforming and replicating props/pieces in general ALWAYS still phases me...I think that it is so cool and I really can't wait til I get a place of my own so I can have the space to really get into things like this...
Captain, how long has/will this process actually take? I am very interested in these things...
|
|
|
|
Post by admin on Feb 5, 2007 0:23:39 GMT -5
Basically, it all depends on everything. This particular silicon rubber is fully cured in 4 hours. But that's just cure time. You can to take many things into consideration. Size and intricacy of the sculpt are big ones. Then it depends one the type of item you're casting, so the process itself can vary. Mike can attest to that. He's my teacher in this area. And of course, if you're just starting off it will take longer anyways.
This process began this morning at around 11am by building up the clay dam. That took a whopping 5 minutes since it's a small area. Then I had to prep the rubber pouring process by gather my materials, cutting my plastic cups to the estimated size (which was just right), then I had to pour and mix the rubber (mixing took about 10 minutes), and then pouring the rubber in the molding area, but it's a super thick, so "pour" is a bad word. Plus I'm missing my 100 pack of plastic spoons, so I had to resort to plastic forks. THAT was fun. But it was a fairly short process in retrospect. Most of the time was just waiting for it to cure, and lucky my gf came over today so I wasn't just waiting around all afternoon.
|
|
|
|
Post by pghfett on Feb 5, 2007 11:37:37 GMT -5
Welcome to the world of brushable silicone - you'll find everyday house hold items very useful. For thicker rubber my favorite two tools are a cake icing spreader and a short wide bladed butter knife, normal sculpting spatulas are to flexible and weak. Looks great Cap ! Now with a silicone mold you can pour any type of resin you want and with fillers too. |
|
|
|
Post by admin on Feb 5, 2007 22:40:42 GMT -5
Today after classes, I started pouring resin. Having only fiberglass resin on-hand, that's what I used, and they turned out great! Since these are being glued to chest plates, and then nothing else is happening to them (except painting), I figured fg resin is good enough. It's strong stuff, and it glues really well. Today I made two sets. The first set is just pure FG resin, so they are clear.  The second set is FG resin plus mircobulb filler. The only real difference I noticed was that the one with filler in it is *slightly* easier to sand. Tomorrow I have more of an afternoon (12:30pm - whenever), so I can start pouring in earnest. 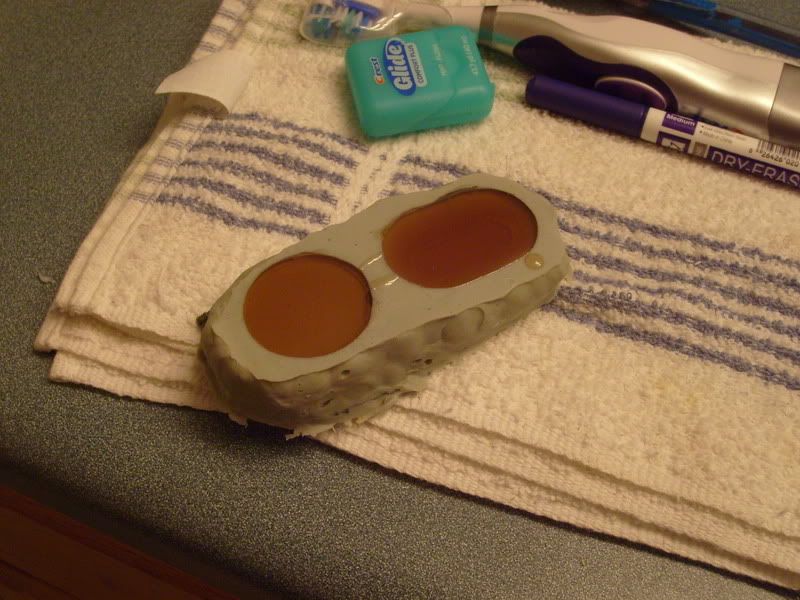 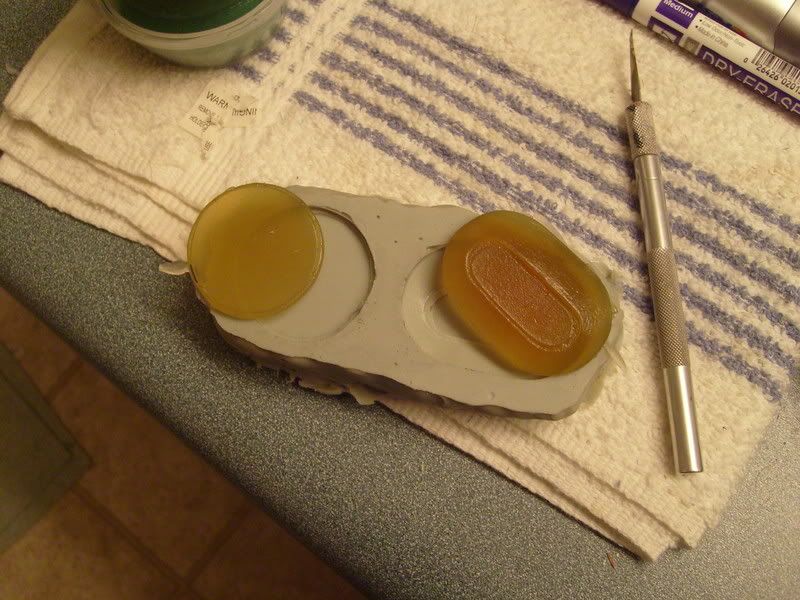 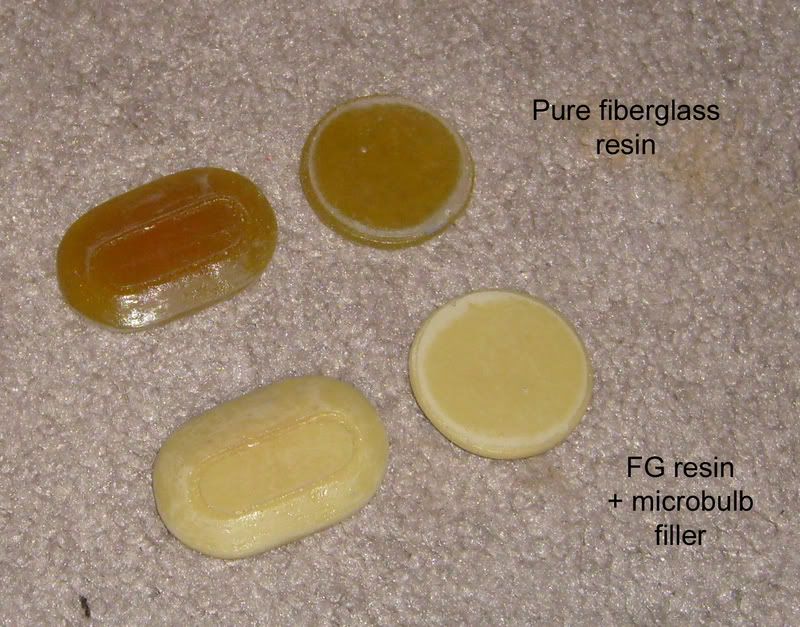 |
|