Post by admin on Nov 7, 2006 23:45:43 GMT -5
Ok here's my GM boot tutorial. It's based off of the TB boot tutorial that is so popular at BSN, so if you're familiar with it, this shouldn't be too difficult.
First, I found a good pair of boots. There are several things to keep in mind when looking for a good base GM boot:
1) Feature-less body. This is pretty important in my book, since no detail on the surface of the shoe will provide a cleaner look.
2) Thick, chunky sole. Doesn't need to be accurate, since you're probably never going to find Kenneth Cole Pit Crews. The sole should not be thin and chunky (like some combat boots), but rather more like a thick hiking boot.
3) Thin ankle area. This is actually the most imporant feature. A low-profile ankle area will make wearing you shin armor comfortable/possible. Too thick of an ankle section will prevent your shin armor from being comfortable, and may even prevent it from being worn in the first place. So keep it low and thin.
That being said, the boot I found was a good find. Like the Pit Crew, this boot is also out of production, funny enough. It's some off-brand, "Quest," and it's a hiking ankle boot. It has literally no surface detail, it has a thick chunky sole, and the ankle is really low, and really thin. Another good thing is that the outside is suede and would later hold onto the shoe-goo like mad. The boot color doesn't matter because it's going to be covered in white vinyl anyways, but I had to accept the boot with a black sole, so I ended up having to paint the sole in the end. A small sacrifice, yes, but thinking realistically, no little kid is going to be staring at your feet.

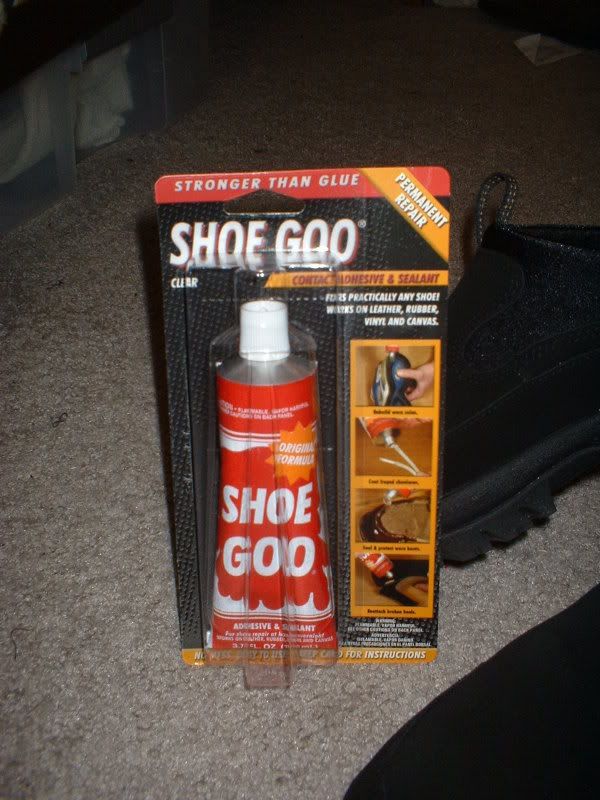
The glue I used throughout this build up was Shoe Goo, found at Wal-Mart in the shoe department. This stuff is super crazy powerful contact cement, and it's flexible so it's perfect for shoes, and is therefore perfect for this project.
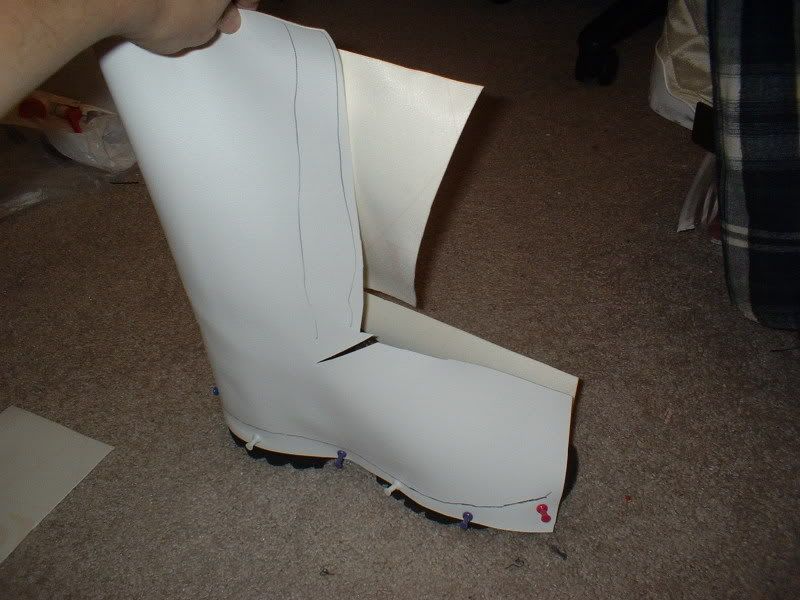
The first step was to cut out a pattern. Your pattern will be unique to your boot, so be sure to buy plenty of extra vinyl (I recommend two yards for this project - you WILL have extra). You'll need lots of vinyl so you can play with designs that work. You'll want it to wrap around the back of your boot and have each end meet up at the toe of the boot. Your velcro closure will be at the front of the shin, so keep that in mind. Pin the sucker to your boot soles.
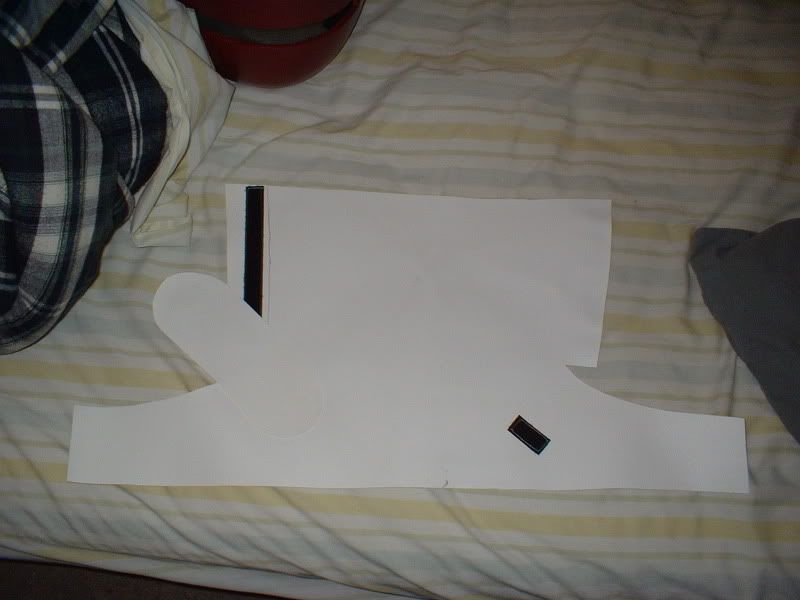
Once you have your pattern tweaked so that you can glue it down and not cut anything from the top part, remove it and sew on your velcro tabs. IGNORE the little flap I sewed on mine. It was a failed experiment that never made it to the final boot.
Now here is where we start to glue it down. Use plenty of glue, but don't make it too thick. Smear it on with your finger (don't worry, it rolls off), and ONLY WORK IN SMALL SECTIONS! This will take a while, so work on both boots at once.
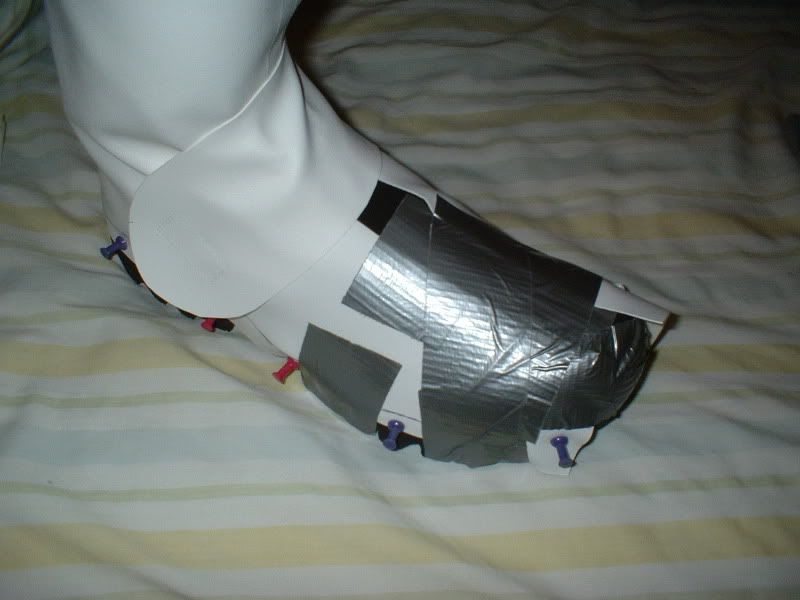
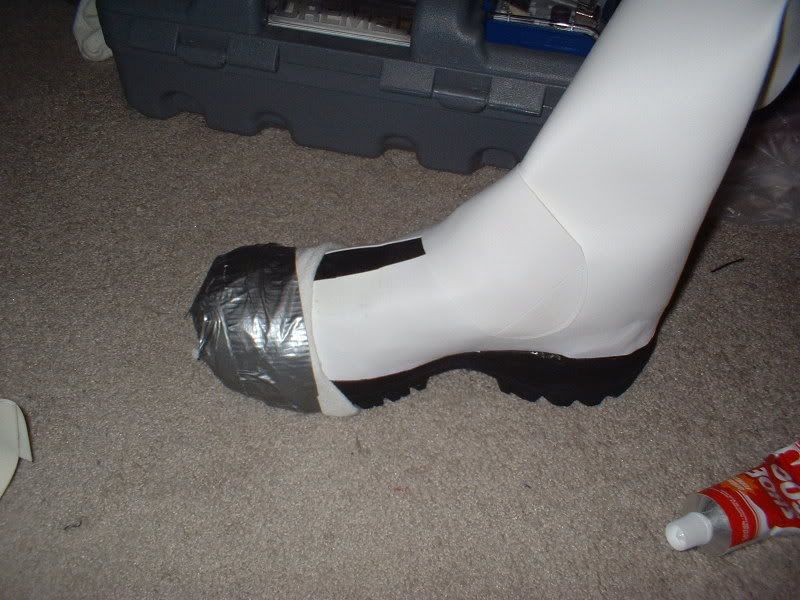
When you start gluing, pin each section back to the sole like you originally had it, and then wrap the glued section in an old sock. You'll then duct tape the sock in place. Do it reasonably tight, you don't want it slipping off. The sock is important because as the glue cures, it heats up and will melt the duct tape if there is no insulation (sock). Some glue may seep out of the edges, so you can just cut it away with a good razor.
[Note: This photo was taken before I learned of the sock trick. This duct tape melted like crazy.]
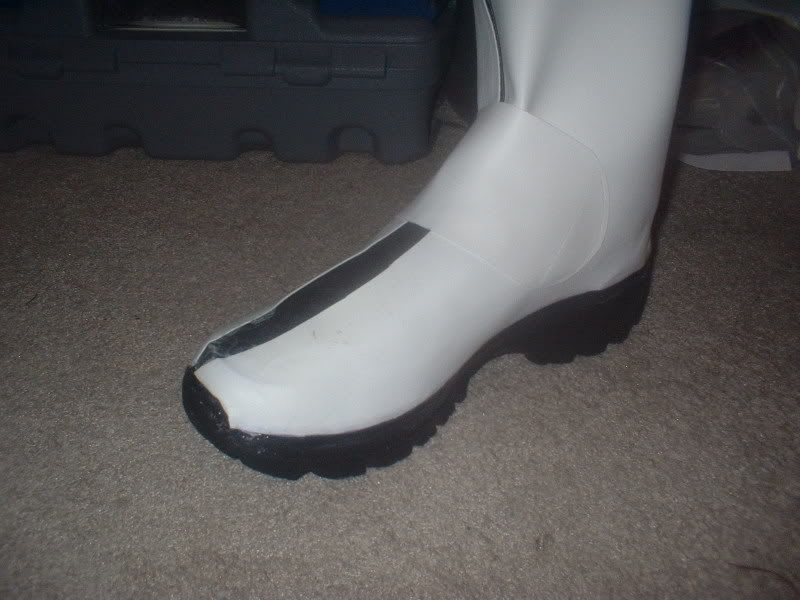
As I glued, I liked to cut away the area at the sole, but this can be done when you finish gluing.
Note here that the toe is not completely covered. This is ok and is actually recommended. You'll get a better feel of what needs to be done this way, and you won't have to bother yourself with how vinyl folds and stuff. The toe armor will be covering this section anyways.
[Note: Again, please ignore the flap. I removed this.]
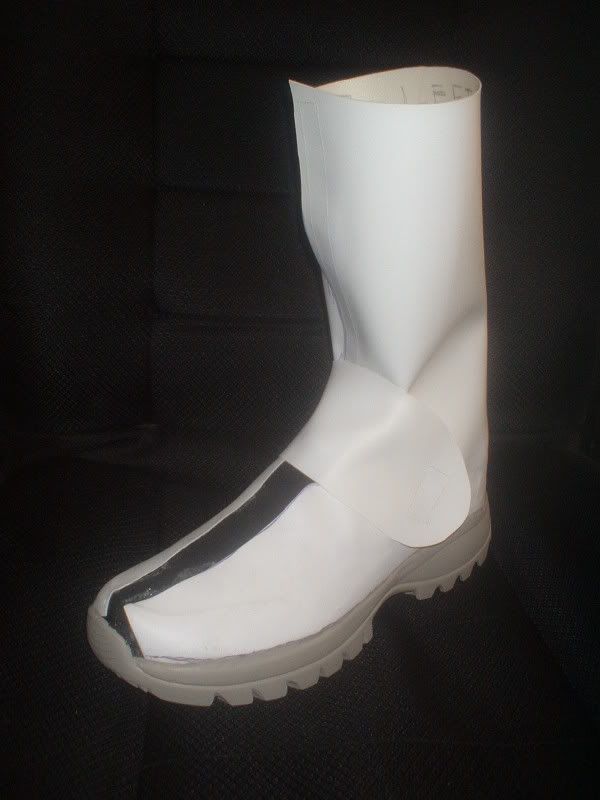
I then painted the soles. I just took some tan acrylic paint and painted it right on. After a few events, it started to flake off in tiny bits at the very bottom, but that should be expected. When I painted the sole, I covered it in a layer of Shoe Goo (it's also a sealer). You will have to do touch-ups later on after a few events, but it's good to check over your armor anyways.
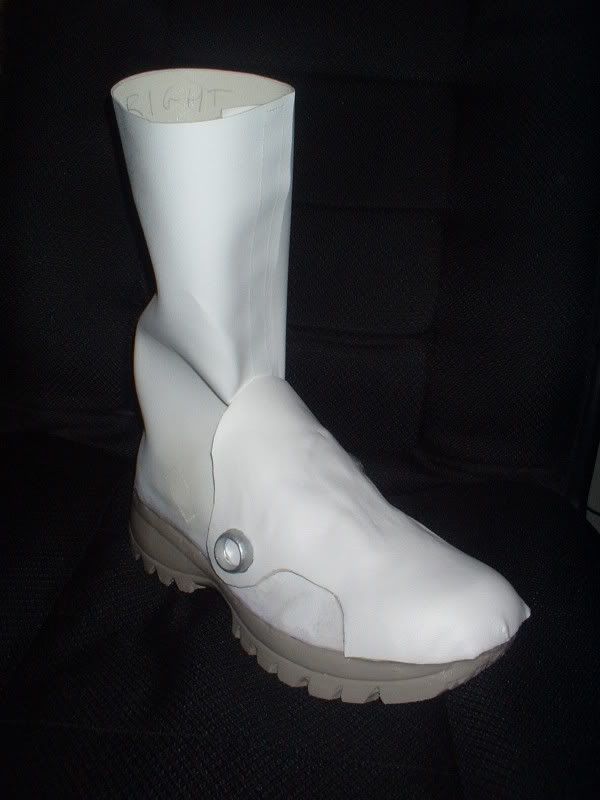
The toe armor is tricky, and I apologize in advance for not having step-by-step photos of this. My toe armor is craft foam, heat-formed into place, cut to shape, glued in place (Shoe Goo), and then covered in more white vinyl. The toe of the boot will be problematic, but you can get away with it by cutting little slits in the folding area to relieve some of the tension. My armor is only glued at three places: at the two, and at each greeblie. There is no need to glue the whole thing, and not doing so will help keep some of the boot's original flexibility. You will definitely want to glue this in sections - I started with the toe, and then did the greeblie sections. I finished it off by covering it in white vinyl stretched over it and glued in place. The greeblies were parts of the screw-on caps from spray bottles that I cut away and glued in place.
First, I found a good pair of boots. There are several things to keep in mind when looking for a good base GM boot:
1) Feature-less body. This is pretty important in my book, since no detail on the surface of the shoe will provide a cleaner look.
2) Thick, chunky sole. Doesn't need to be accurate, since you're probably never going to find Kenneth Cole Pit Crews. The sole should not be thin and chunky (like some combat boots), but rather more like a thick hiking boot.
3) Thin ankle area. This is actually the most imporant feature. A low-profile ankle area will make wearing you shin armor comfortable/possible. Too thick of an ankle section will prevent your shin armor from being comfortable, and may even prevent it from being worn in the first place. So keep it low and thin.
That being said, the boot I found was a good find. Like the Pit Crew, this boot is also out of production, funny enough. It's some off-brand, "Quest," and it's a hiking ankle boot. It has literally no surface detail, it has a thick chunky sole, and the ankle is really low, and really thin. Another good thing is that the outside is suede and would later hold onto the shoe-goo like mad. The boot color doesn't matter because it's going to be covered in white vinyl anyways, but I had to accept the boot with a black sole, so I ended up having to paint the sole in the end. A small sacrifice, yes, but thinking realistically, no little kid is going to be staring at your feet.
The glue I used throughout this build up was Shoe Goo, found at Wal-Mart in the shoe department. This stuff is super crazy powerful contact cement, and it's flexible so it's perfect for shoes, and is therefore perfect for this project.
The first step was to cut out a pattern. Your pattern will be unique to your boot, so be sure to buy plenty of extra vinyl (I recommend two yards for this project - you WILL have extra). You'll need lots of vinyl so you can play with designs that work. You'll want it to wrap around the back of your boot and have each end meet up at the toe of the boot. Your velcro closure will be at the front of the shin, so keep that in mind. Pin the sucker to your boot soles.
Once you have your pattern tweaked so that you can glue it down and not cut anything from the top part, remove it and sew on your velcro tabs. IGNORE the little flap I sewed on mine. It was a failed experiment that never made it to the final boot.
Now here is where we start to glue it down. Use plenty of glue, but don't make it too thick. Smear it on with your finger (don't worry, it rolls off), and ONLY WORK IN SMALL SECTIONS! This will take a while, so work on both boots at once.
When you start gluing, pin each section back to the sole like you originally had it, and then wrap the glued section in an old sock. You'll then duct tape the sock in place. Do it reasonably tight, you don't want it slipping off. The sock is important because as the glue cures, it heats up and will melt the duct tape if there is no insulation (sock). Some glue may seep out of the edges, so you can just cut it away with a good razor.
[Note: This photo was taken before I learned of the sock trick. This duct tape melted like crazy.]
As I glued, I liked to cut away the area at the sole, but this can be done when you finish gluing.
Note here that the toe is not completely covered. This is ok and is actually recommended. You'll get a better feel of what needs to be done this way, and you won't have to bother yourself with how vinyl folds and stuff. The toe armor will be covering this section anyways.
[Note: Again, please ignore the flap. I removed this.]
I then painted the soles. I just took some tan acrylic paint and painted it right on. After a few events, it started to flake off in tiny bits at the very bottom, but that should be expected. When I painted the sole, I covered it in a layer of Shoe Goo (it's also a sealer). You will have to do touch-ups later on after a few events, but it's good to check over your armor anyways.
The toe armor is tricky, and I apologize in advance for not having step-by-step photos of this. My toe armor is craft foam, heat-formed into place, cut to shape, glued in place (Shoe Goo), and then covered in more white vinyl. The toe of the boot will be problematic, but you can get away with it by cutting little slits in the folding area to relieve some of the tension. My armor is only glued at three places: at the two, and at each greeblie. There is no need to glue the whole thing, and not doing so will help keep some of the boot's original flexibility. You will definitely want to glue this in sections - I started with the toe, and then did the greeblie sections. I finished it off by covering it in white vinyl stretched over it and glued in place. The greeblies were parts of the screw-on caps from spray bottles that I cut away and glued in place.