|
|
Post by CloudStrife7 on Nov 28, 2010 20:18:37 GMT -5
I used photoshop to try and compare your helmet to the reference image we have. If you find these photos helpful I can provide more - but I have a request - could you take a photo of the bucket at the same angle as the reference photo we have? Then can photoshop your bucket with the CG eyes/cheeks in the same position to give you an idea what your finished helmet should look like.      Above: Red lines are where your current eyes are.  Above: CG eyes edited onto your helmet --- Let me know what you think! |
|
|
|
Post by boba on Nov 29, 2010 6:28:13 GMT -5
its looking good bro! keep up the good work  |
|
|
|
Post by heatshock on Nov 30, 2010 2:10:07 GMT -5
- really helpful comparison cloud! - not sure I can get the same angle on the photo - will try after the next sand - I already suspected the eye sockets and had modified it already  nice to see my eye matches up with all the new fangled TEK-NOW-LOW-GEE thang! - the overlay shot also demonstrated a constant problem with making helmet from CGI models the inconsistencies! Look at the left and right edge of the where the cheeks end - the left side is slightly below, adn the right slightly above. Worse still; the angle of the cheek would appear to be sharper than on my sculpt, but then the profile view would be thrown off then. - my sculpt aint perfect, but very happy with how I got it (esp..ly since I have fixed the eyes!) OUTCOME: - eyes to be re-shaped - cheek angle and length; very happy at the mo' Nate |
|
|
|
Post by heatshock on Nov 30, 2010 21:05:31 GMT -5
I always hated a tease havent been able to get out to the shop to sand as its freezing at the mo' I did go and snap some piccies to show what I have done - you will defo see an improvement in the eye sockets 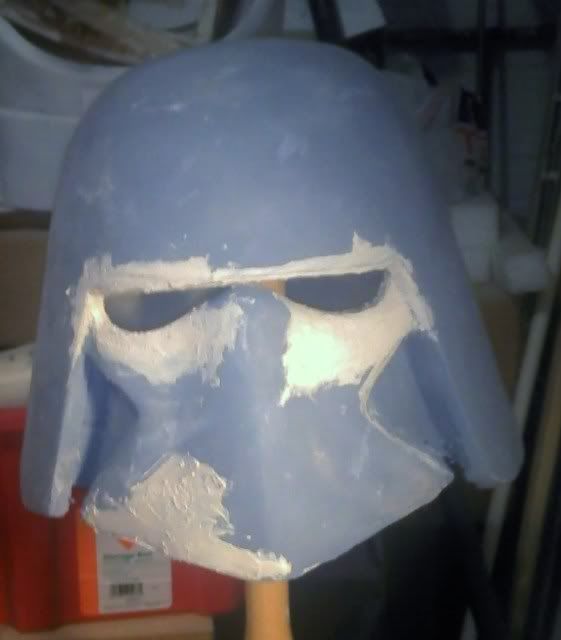 I compostied piccie pre/post mod on each half of teh face plate 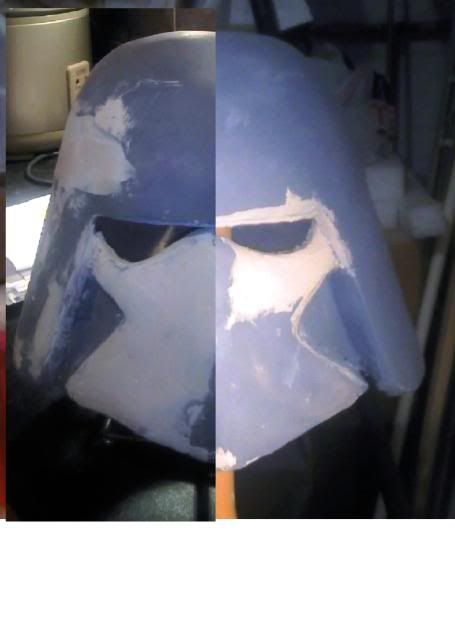 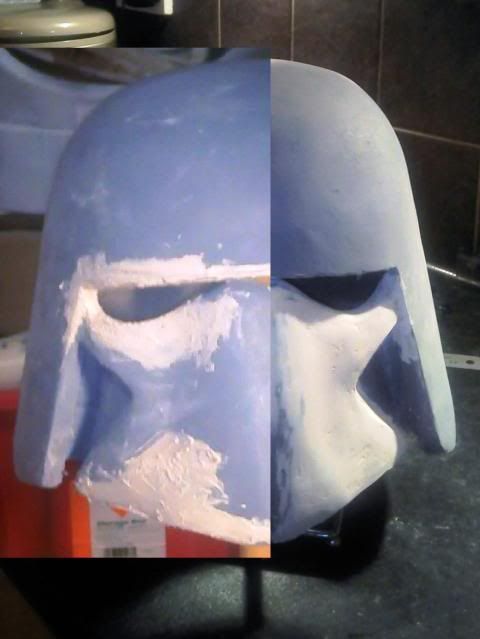 whatcha think? Nate |
|
|
|
Post by RamZnation on Nov 30, 2010 21:41:47 GMT -5
Looking good!
|
|
|
|
Post by CloudStrife7 on Dec 1, 2010 12:56:45 GMT -5
Look at the left and right edge of the where the cheeks end - the left side is slightly below, adn the right slightly above. Worse still; the angle of the cheek would appear to be sharper than on my sculpt, but then the profile view would be thrown off then. Heatshock, you said 'the left side is slightly below, adn the right slightly above" I think this is because of the helmet in the reference is tilted on an angle. When you take a photo of your helmet in the same angle, and put the two side by side, I'm sure they will look much more similar. Is there any way to make the helmet bucket thinner? Please see pic below: lh5.ggpht.com/_dEmn2yz7ark/TPaLERO9G8I/AAAAAAAAATs/MexjPBAuFZg/s1024/thinkvsthin.jpgOn your helmet the area I highlighted is much thicker than on the reference photo. Can this be changed or will that damage the structural integrity of the helmet? |
|
|
|
Post by heatshock on Dec 2, 2010 0:19:11 GMT -5
Yeah it can be. Leaving it at the mo whilst i amn man handling the helmet. loads of sppace at the mo' to allow for sanding as well. Will only do that right at the end
|
|
|
|
Post by CloudStrife7 on Dec 2, 2010 13:44:11 GMT -5
OK, just giving you my constructive criticism so the helmet can be the best available! The last thing I thought of was in the reference photo it looks like the lid curves downward over the eyes a little bit. Did you notice that as well?
|
|
|
|
Post by heatshock on Dec 2, 2010 14:01:10 GMT -5
its all good mate - we are all big boys here not sure what you mean abt the curve? is that curve from the profile view? Pic to illustrate maybe? I used the turnaround view for lots of hte big-picture prospectives - so no curves I could see. the leaving the recessed bits for last is a thing I do for pep builds. Prob a personal quirk, but instead of trying to get bond and files into corners, I just cut away the layer I need and back it up with a new piece of sintra behind - voila, instant sharp corners! lol From teh front, it looks like the helmet dips down a bit - but I think its an optical illusion caused by the high nose bridge - which I have replicated in my build I think. |
|
|
|
Post by boba on Dec 3, 2010 9:10:34 GMT -5
wow when its superimposed with the real thing its getting so close buddy!
|
|
|
|
Post by heatshock on Dec 3, 2010 11:37:43 GMT -5
I must admit i was surprised by that as well; i mod by eye rather than by measurement
Appreiate the compliments; although i realise i wont be able to satisfy every1 !
|
|
|
|
Post by CloudStrife7 on Dec 3, 2010 14:16:36 GMT -5
I noticed the eyes might need to be re-shaped to be slightly longer and more narrow. Check out this image:  Any idea when you might be able to take a photo similar to the reference we've been using? |
|
|
|
Post by heatshock on Dec 3, 2010 23:00:29 GMT -5
ok tried to get the slight angled look on this pic; soz abt all the dabs of bondo - I'm at that stage where I am finding little irritating divets and uneven-ness of the dome, which is driving me crazy! WIll post more pics up once I get it all covered in primer grey 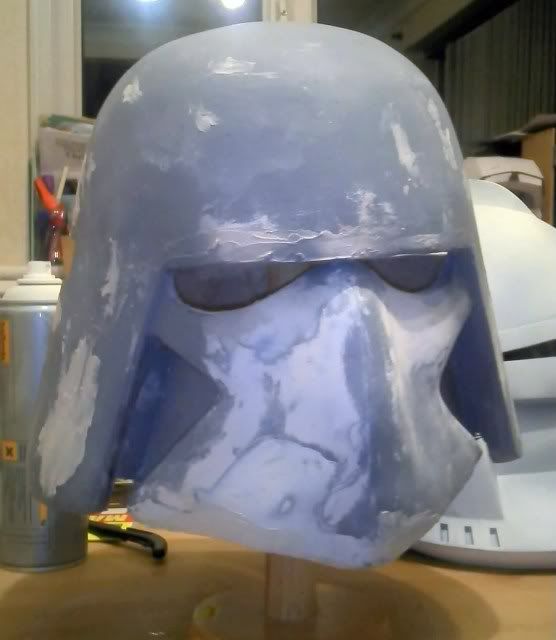 thanks for comments so far cloud - its been really useful. We dont always have to agree, but yours challenges go back and make be re-evaluate my intepretations. When I have been doing a sculpt for some time, I tend to 'over-interprete' - so its nice to have a set of fresh eyes on the helmet in the case of the eyes - I would disagree. From several points of view (1) the ref you have used is useful, but I can see that its a tilted down look; so I think its actually bigger than the pics show (2) look back at the turn-around ref pic - and zoom right up, the eye slots are quite big, so mine are a compromise of that pic and the ref pic you are using (3) from a practical point of view - I want em that much bigger so I can see out of em. heres a pic of the lid on me - I am 5'10'' abt 90kg ie 14 stone/200lbs (no snigerring back there!) 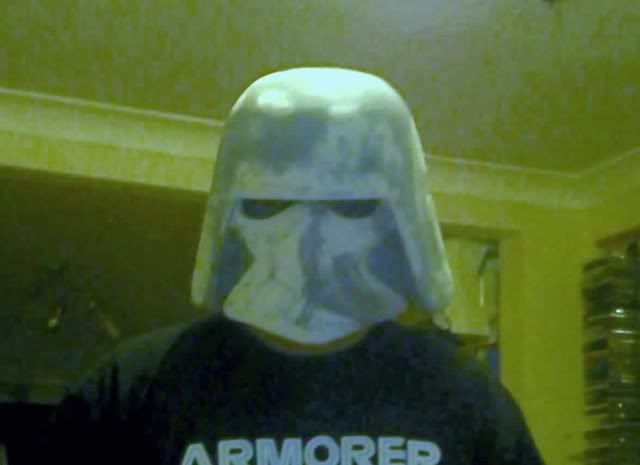 BUT PLEASE PLEASE PLEASE continue with the criticism man, its real helpful. heres the other thing you were converned abt mate; I have sketched out the cut line on the lid as is to show how thick the lid will appear on the end product. (you can kinda see it on the 1st pic above as well if you stare real hard) 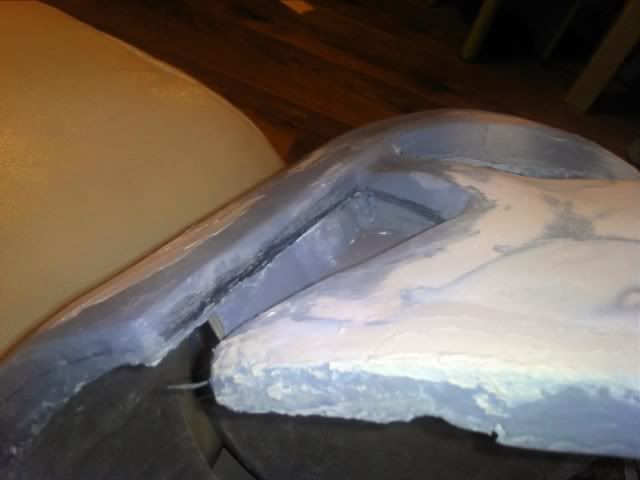 light at the end of the tunnel soon. Its that real irritating wet/dry sanding stage. Aiming to have this baby in a silicone bath Jan/Feb 2011 hopefully. |
|
|
|
Post by CloudStrife7 on Dec 3, 2010 23:48:11 GMT -5
|
|
|
|
Post by heatshock on Dec 4, 2010 0:06:04 GMT -5
heh - aint no right or wrong I think thanks for the work on the pic! demonstrates it elegantly. its gonna be intpretation at the end of the day as the ref pics are so inconsistent from source to source but I think the compromise should make most people happy. And if they want it small - easy enough to bondo it slimmer. As long as I get the few people here happy with the look (so far theres you, me, boba, ram and Il-matic) that would be good enough for me Nate |
|