|
|
Post by midniterider on May 9, 2010 22:37:25 GMT -5
This is Midniterider, I am a member of Garrison Carida and currently hold two (2) designations: TK and CT (Shocktrooper). Current project is a Galactic Marine, so I thought I would open a thread to document my WIP. I will be adding pics as I go, and I welcome your comments and opinions, for your knowledge and experience can help me make this a great costume. At this time the parts that I have in my possession are:
SGB Helmet
Laws chest & back plate
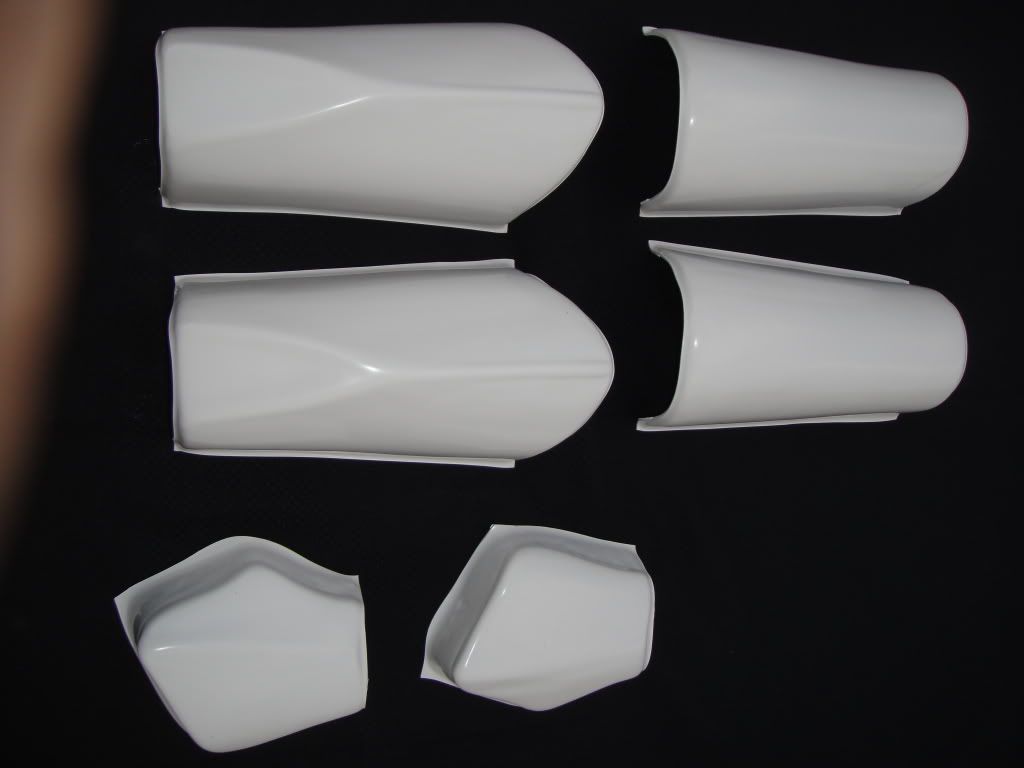
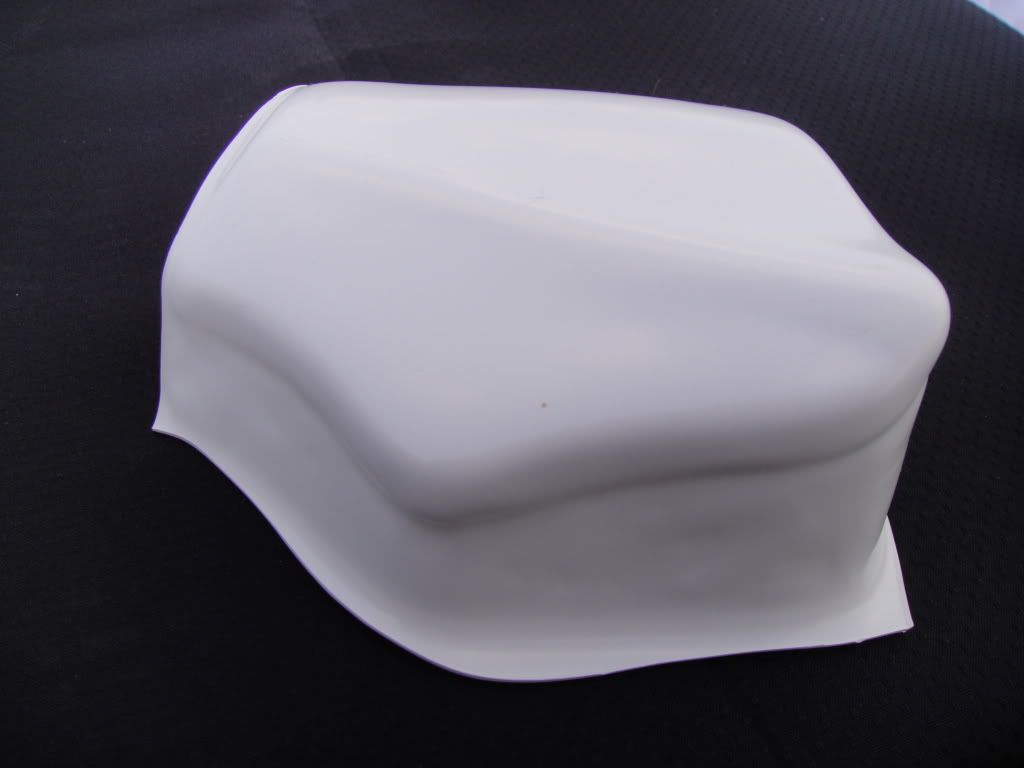
OSCS clone forearms, handplates, & one (1) shoulder bell
Moncal TB shoulder bell
Currently ready for shipment
Steelblitz GM backpack w/pouches
Steelblitz ammo boxes (chest & arm)
Steelblitz chest greeblies
Steelblitz shoulder straps
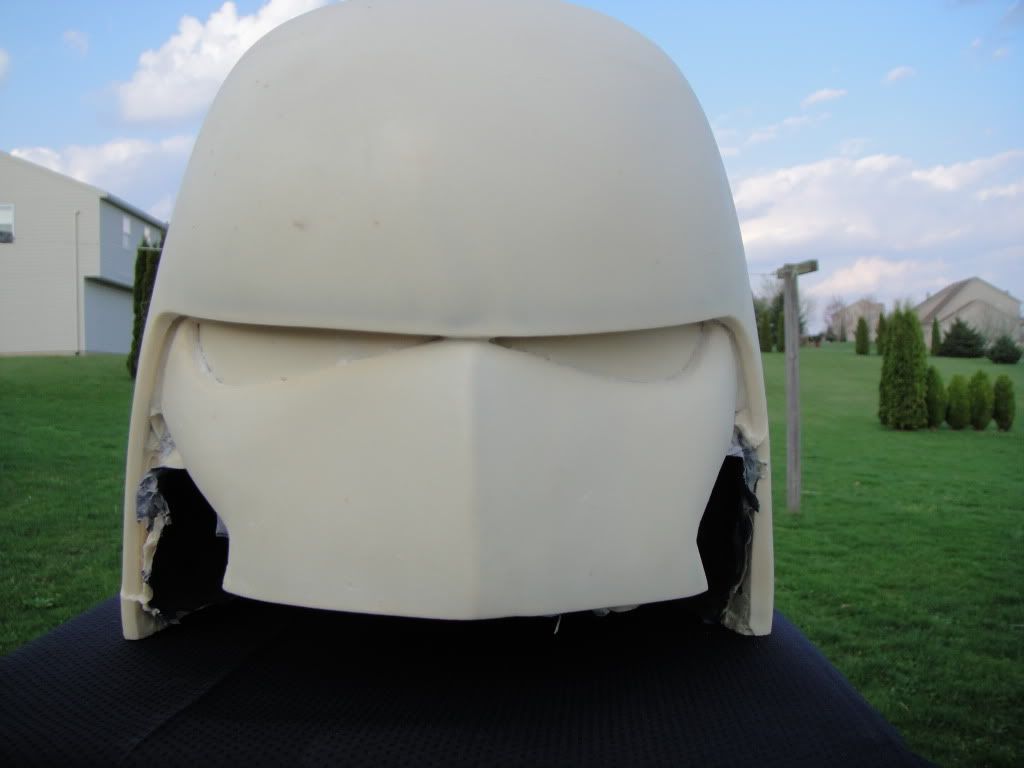
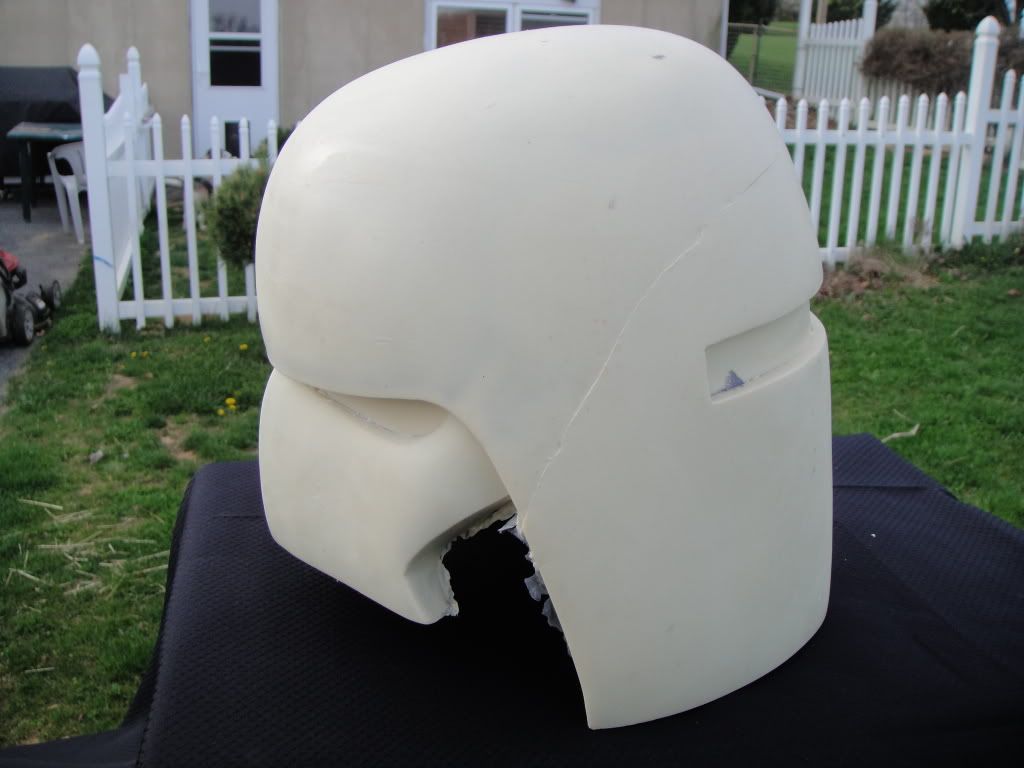
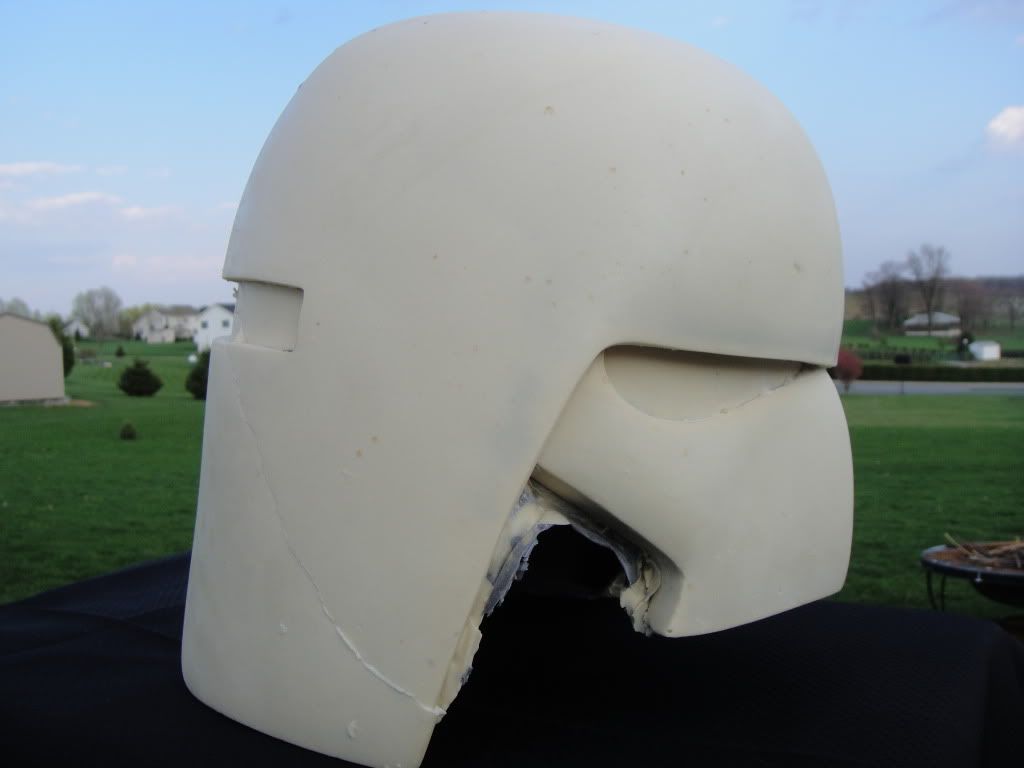
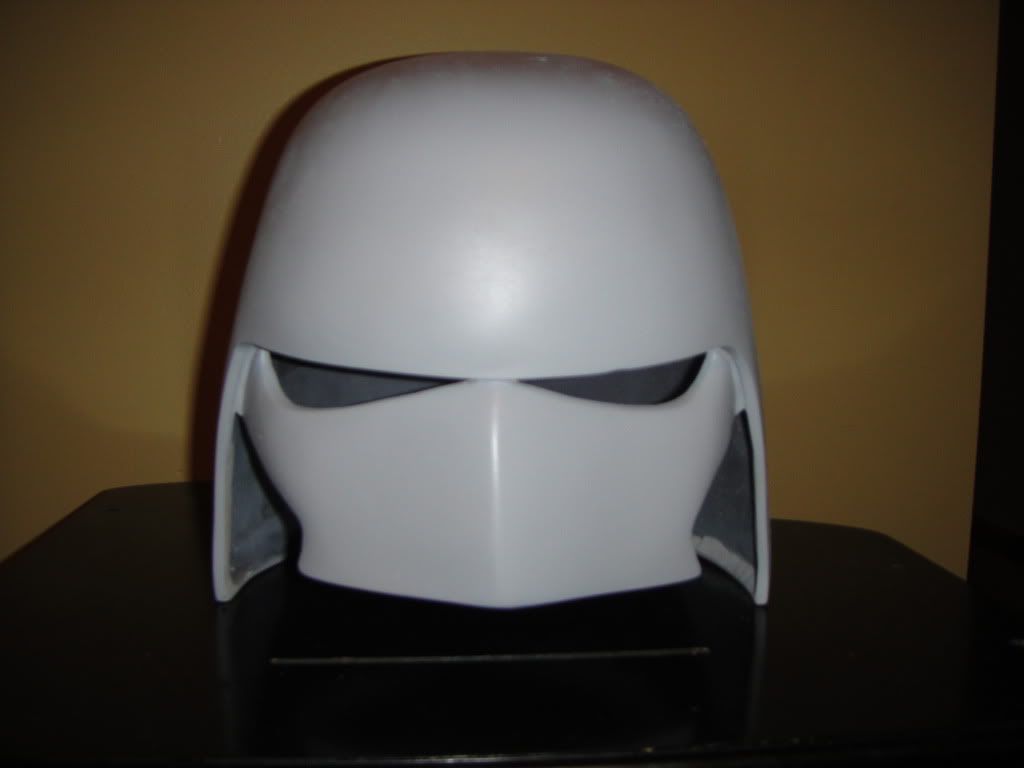
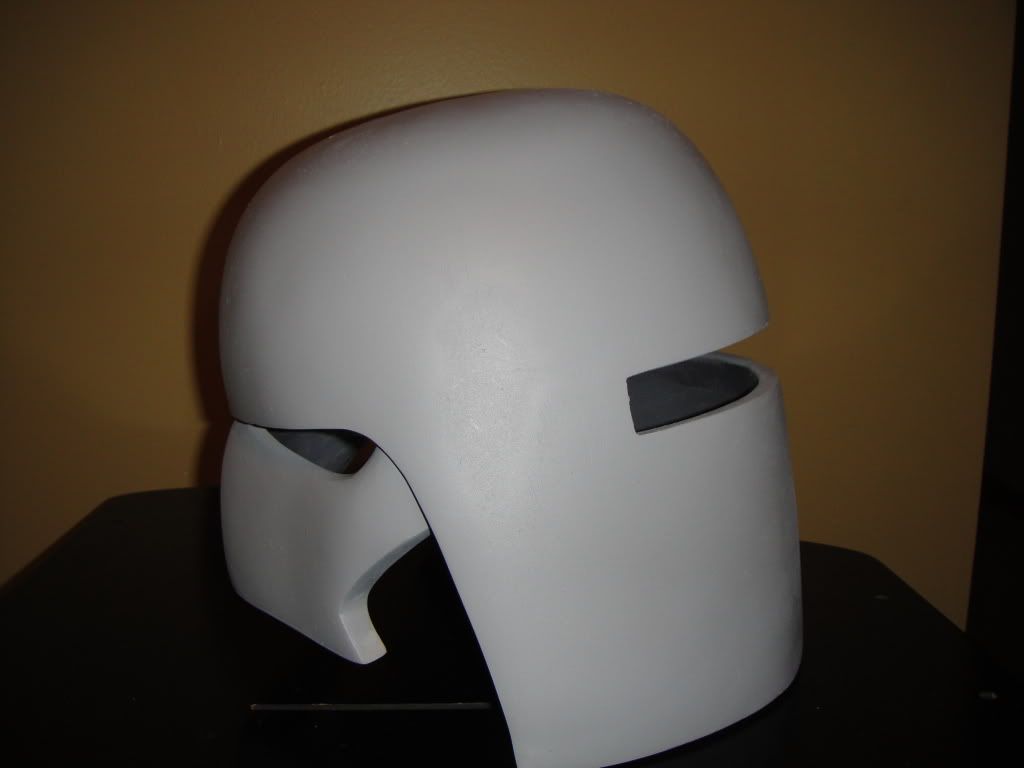
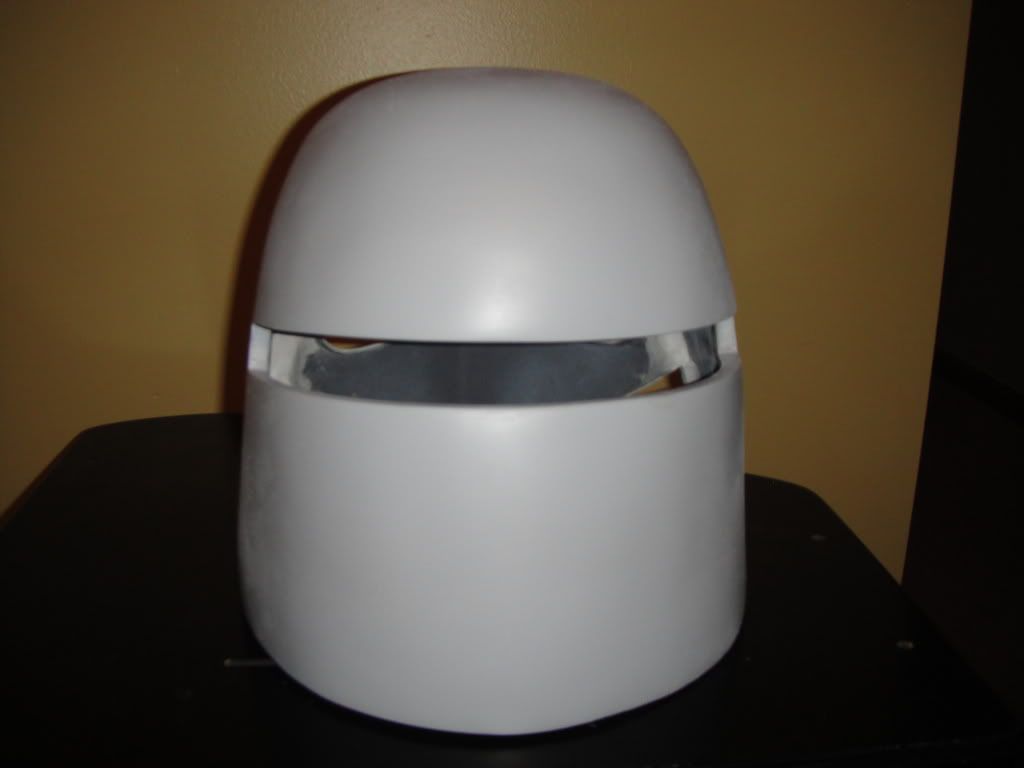
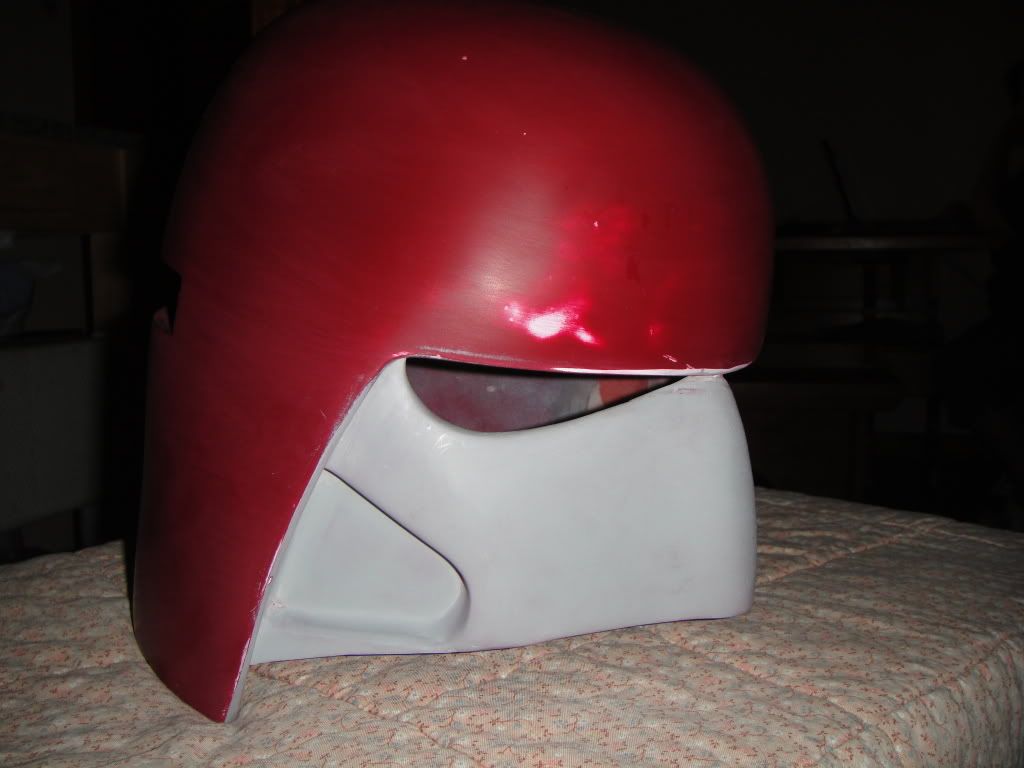
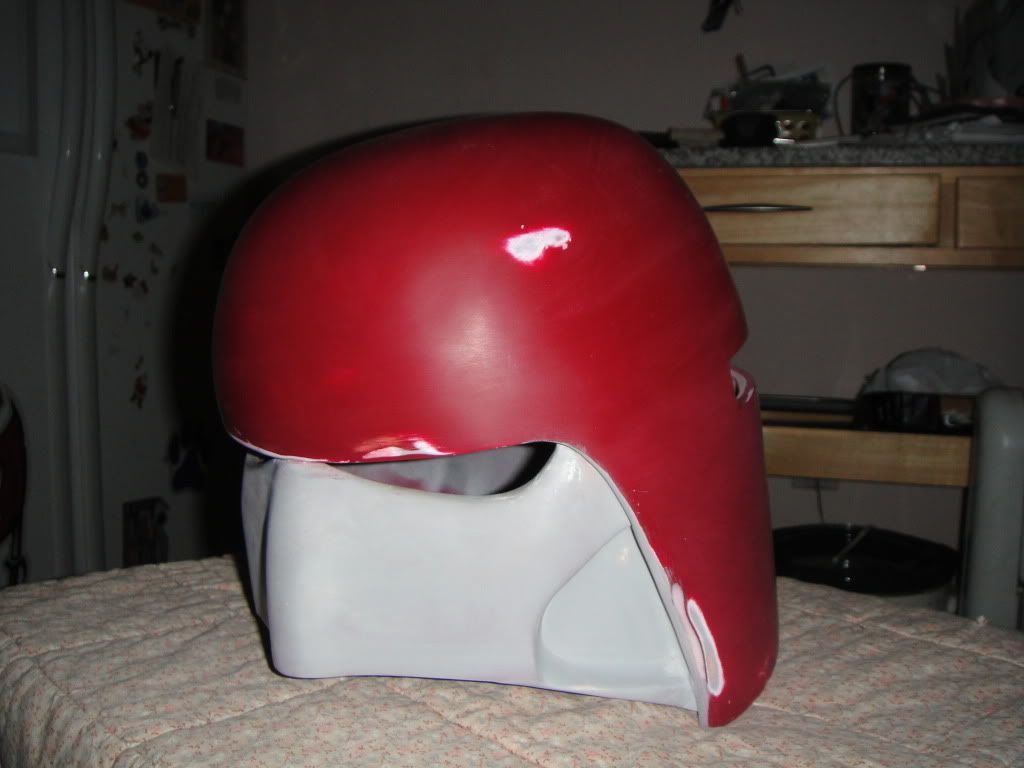
So I started this build with the SGB helmet, which truly is an amazing helmet. Took the raw form, trimmed it out, and used Bondo and spot putty to correct some imperfections. After really studying my work on the bucket, I decided it was ready for paint. Primed it, sprayed a coat of white, then gave the final coats of Rustoleum satin claret wine. Then I went back to the 53rd FAC website (for some reason) and started reading & comparing some of the different threads, and other member's helmets. I made a BIG mistake and forgot to look at some of reference shots, did not realize that there appears to be "cheeks" very similar to Phase II clone helmets of Episode III, and a bridge of a "nose". Frustrated, I realized that I should have did some homework and reading first, but I want to do it accurate & right, so I started modifying the "beak" adding cheeks and a bridged nose. So at this time, I am sanding the helmet down with 220 grit sandpaper, then higher grits to get any and all scratches out, and then will repaint with the Rustoleum claret wine.
|
|
|
|
Post by midniterider on May 9, 2010 22:56:47 GMT -5
|
|
|
|
Post by RamZnation on May 15, 2010 17:10:44 GMT -5
Looking good!
|
|
SPIDER
Higher Junior Member

Posts: 60
|
Post by SPIDER on May 19, 2010 13:02:43 GMT -5
I just started ordering parts myself, so I will be watching your progress. Hopefully learning some stuff.
|
|
|
|
Post by midniterider on May 19, 2010 21:51:54 GMT -5
Spdr1,
Should you have any questions or comments, please don't hesitate to post them. I am always looking for feedback, and would look forward to helping you in any way. Perhaps we could compare notes and learn together as our builds progress.
Ken Querio
TK / CT - 7462
Garrison Carida
|
|
|
|
Post by midniterider on May 20, 2010 21:04:25 GMT -5
Sanded down the helmet with 400 grit sandpaper, then wiped the helmet with acetone. Once dry, repainted the helmet with Rustoleum claret wine satin with three (3) coats. Gary "Koko" Frenkel and Maul "The WeatherMan" Zabrak came over last week to work on the new Shocktrooper. Maul grabbed the helmet and used his special "curb / pavement" weathering technique and took it to the driveway. After the WeatherMan got done with the helmet this is what it looks like : 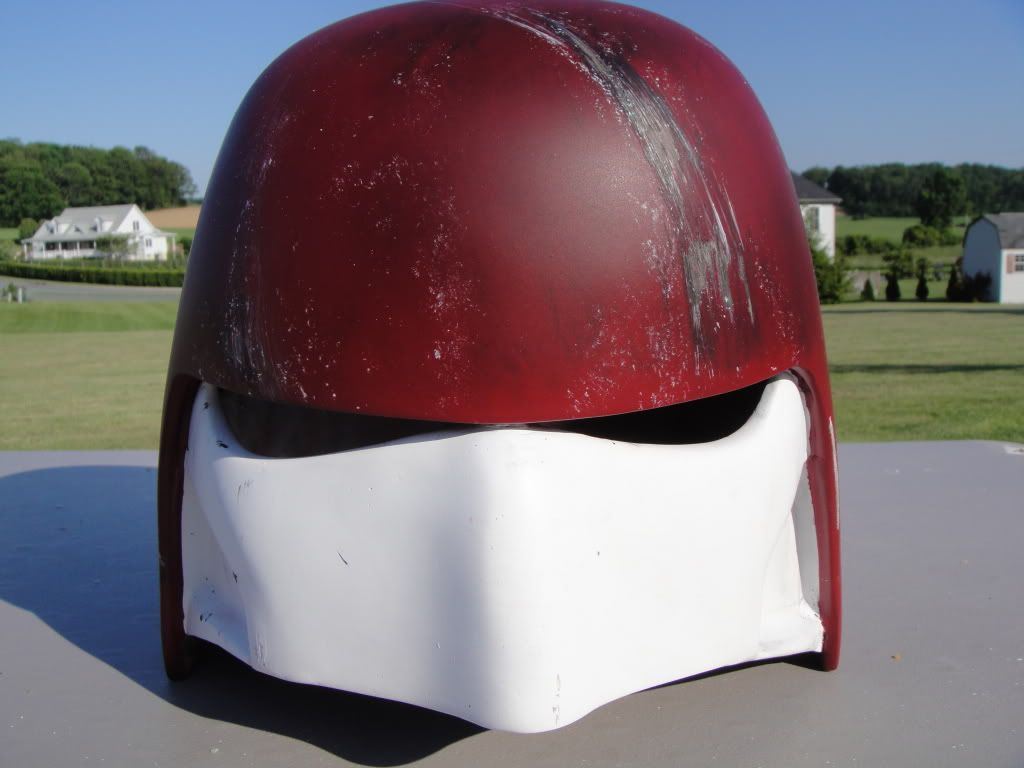 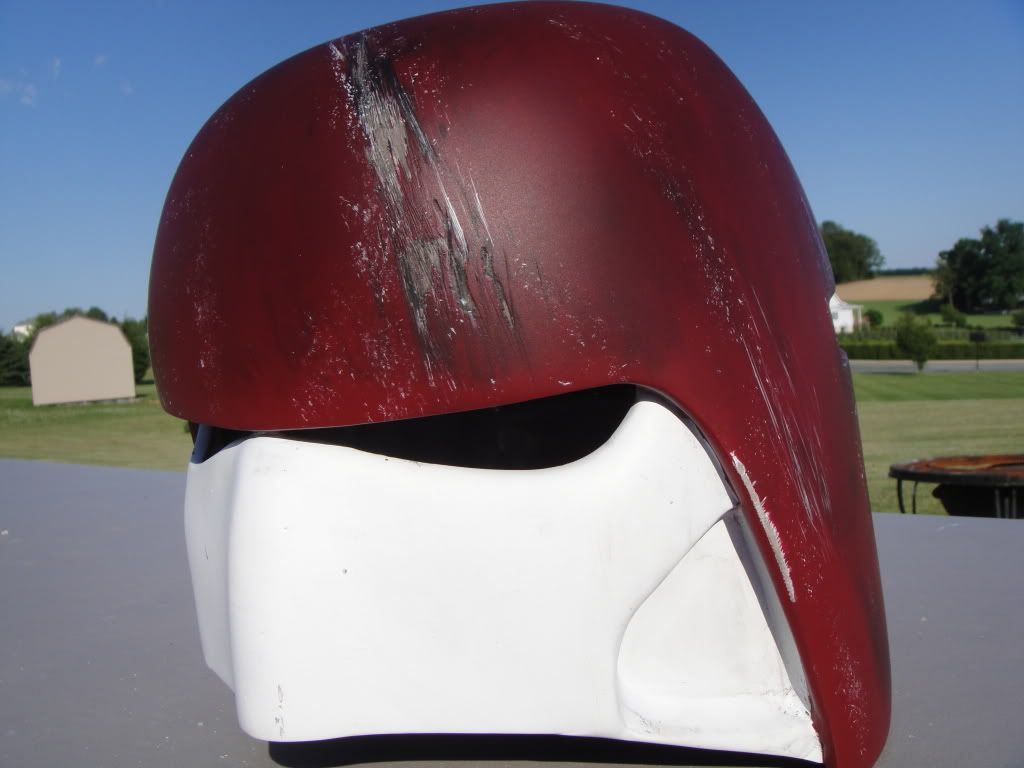 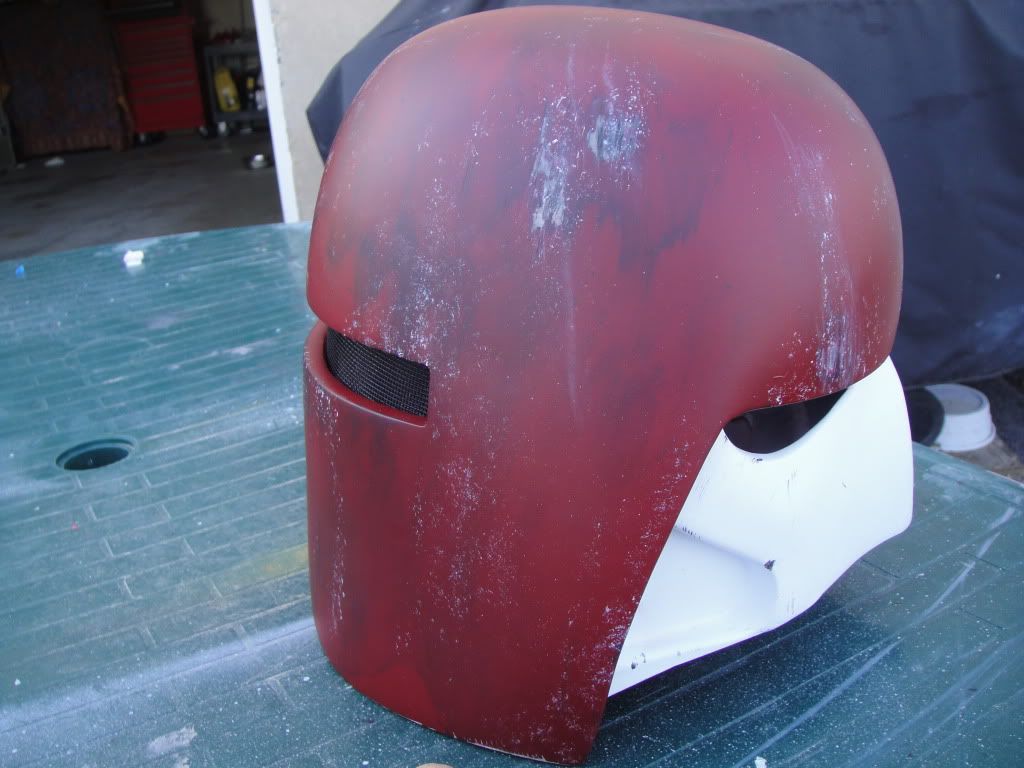 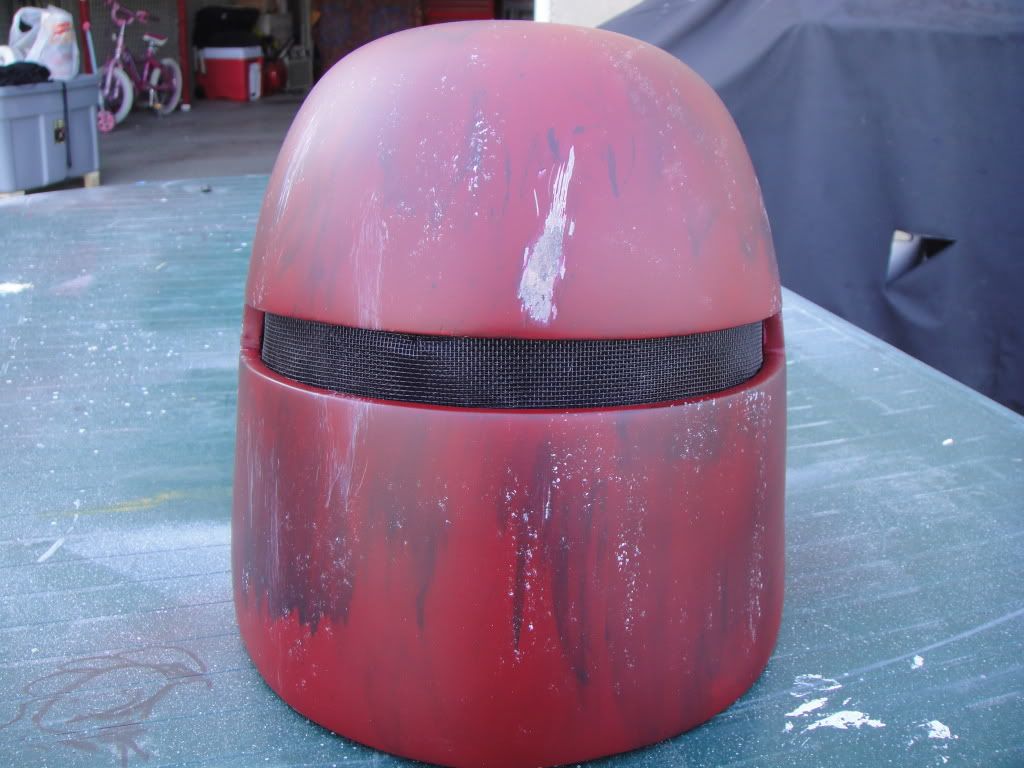 Special thank you to Maul, once again you have done an outstanding job. I am very pleased with the outcome. Only have to install the lenses and cowl. |
|
|
|
Post by midniterider on May 20, 2010 21:06:22 GMT -5
|
|
|
|
Post by RamZnation on May 21, 2010 1:53:36 GMT -5
Looking really good! I like what I see. Keep up the good work. Your WIP is looking awesome!
|
|
|
|
Post by midniterider on Jun 13, 2010 13:41:00 GMT -5
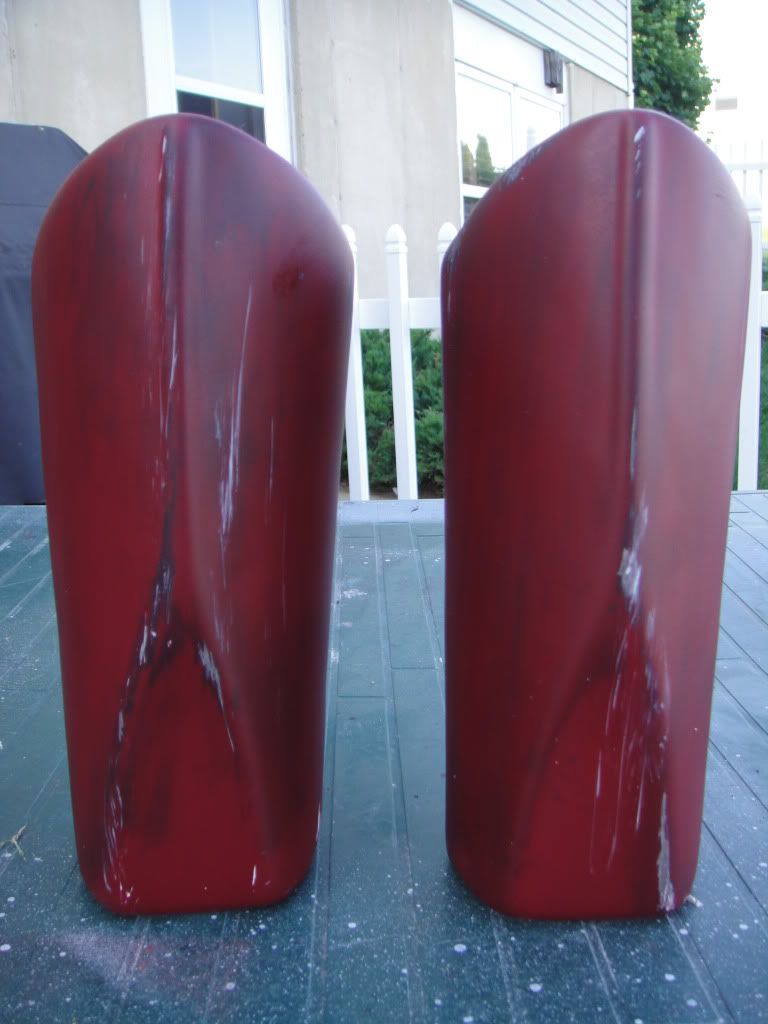
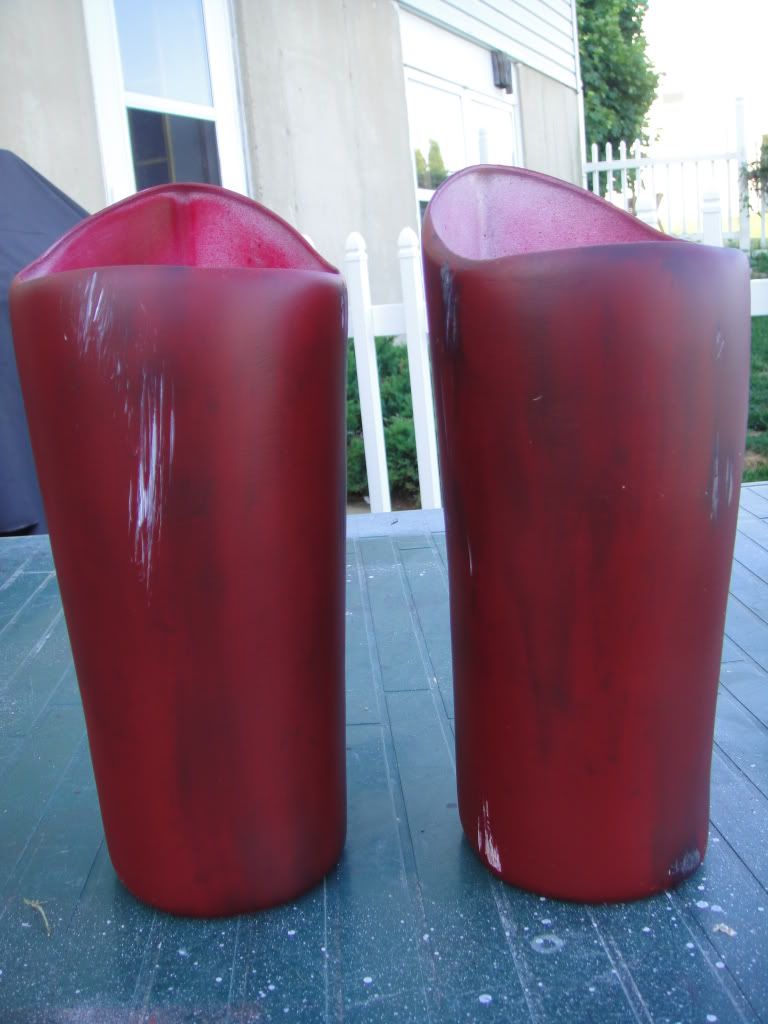
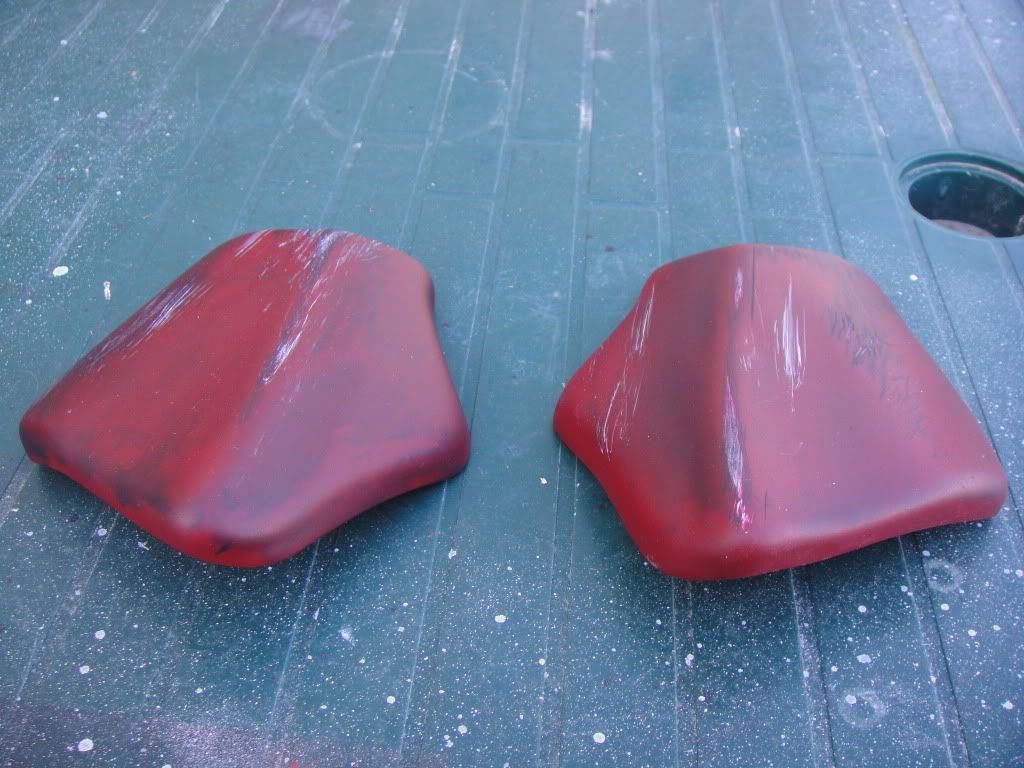
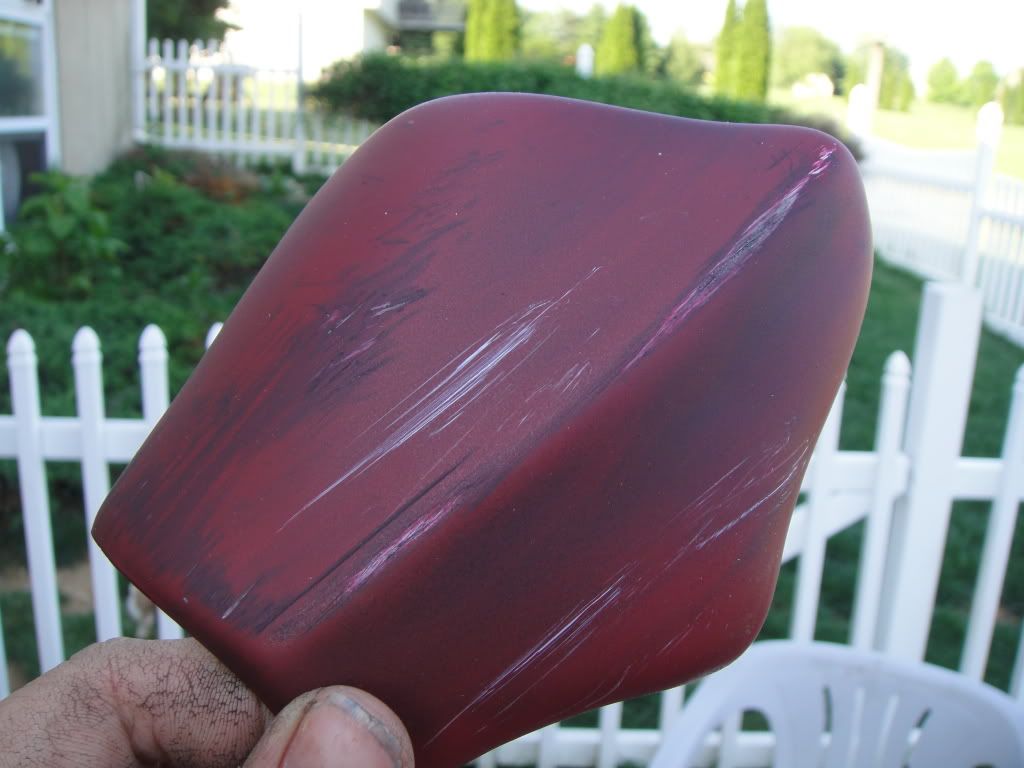
So progress continues on the Galactic Marine as well as some other projects / costumes that I am assisting on the builds. Received the beautiful Dan Laws chest and back pieces as an anniversary gift from my wife, Melanie.   So after the initial "fitting", it was determined that shims were have to be installed to fit my body style. Installed two (2) side shims directly under the arms, and for the final fitting will have one cut down the center (cannon to the clones).   Upon the completition and success of the shim installation, painted the chest/back piece with Rustoleum Satin Claret Wine spray paint. Fabricated the bandolier with a black leather belt and mounted the ammo boxes to the bandolier and painted them. Mounted the bandolier to the chest piece with snaps on the inside of the armor, therefore, it can be removed and reinstalled in the future. Also added the chest greeblies (courtesy of Steelblitz). Here is the final product without the weathering (which is currently underway by THE WEATHERMAN : Maul Zabrak).  Up next was the shoulder bells. The Galactic Marine has two (2) distinct shoulder bells, the left is a standard clone shoulder bell, however, the right bell is a biker scout shoulder bell which has "ribs" -- consensus is a total of six (6) ribs. After looking at various screen shots and pictures, the best representation of this "ribbed" shoulder bell was the Gentle Giant mini bust. So sketched out the pattern on the shoulder bell, then used 10 gauge Romex cable (found at Home Depot) which has two (2) two insulated wires and a ground wire plus it is very malleable / workable.   After molding and bending the wire to conform to the shape and contour of the shoulder bell, use CA glue to initially set in place. Once dry, went back and used Loctite 5 minute epoxy at the base to reinforce the wire ribs. Now the ground wire was the 1st wire that was mounted, and should not have used it, but I improvised, adapted, and overcame by using epoxy putty and corrected my error.   After using epoxy putty and Bondo spot / glazing putty, used my blending method to "fuse" the wire to the shoulder bell. Once satisfied after careful evaluation and coating of primer, used Rustoleum Satin Claret Wine spray paint. Here is the final product, again without weathering and flat clear coat application. Coming soon in the next update: Galactic Marine backpack, weathered chest / back piece, & weathered shoulder bells.    |
|
|
|
Post by midniterider on Jul 26, 2010 21:50:40 GMT -5
Progress on the Galactic Marine is picking up steam. Very special thank you and shout out to Maul " The Weatherman " Zabrak (Garrison Carida member) for joining me on this project and becoming an integral part of the build. The Galactic Marines were cross-trained to fight on a variety of environments in ground and space. They specialized in boarding and capturing enemy starships as well as planetary assault, and were the first line to enter battle. Therefore, I am heavily focusing on detail and we are trying to create a battle torn / tested marine --- a trooper who is out on the front lines, in the thick of battle conditions: weather, environments, schrapnel flying, explosions (ground being thrown up after a bomb or blast has impact or detonated), etc. PART 1So after 5 attempts to install the cowl, and several small additional modifications to the helmet (so the cowl would lie and flow right), got the cowl installed and blended into the "cheeks". Lenses were just recently installed and helmet is weathered and complete. If you notice what appears to be white spots on the lenses, that was white "flecking" that was purposely added to represent ash or snow on the lenses. In the midst of battle, a trooper is not going to have time to remove his bucket and clean the lenses.    Next, the Steelblitz backpack (wonderful / great kit ) was handed over to the Weatherman, where he did an incredible job with the weathering. We decided to take my oxy-acetelyne torch outfit to the backpack to add some blaster hits to the pack. Also, added cloth covers to the pouches to add texture and authenticity to the backpack. End result:     Decided to design and build my own Galactic Marine belt, and again used fabric (duck cloth) to give that texture look. We got creative with the belt pouches to make them appear as if there was something in them. And the one smaller pouch was made to look as if it as possibly an ammo pouch that detonated or the pouch got blasted to hit with schrapnel.    PART 2 COMING SOON!!! PART 2 COMING SOON!!! |
|
|
|
Post by RamZnation on Jul 27, 2010 18:35:11 GMT -5
Your build is coming along really nice! I'm actually getting jealous of yours just looking at it.
|
|
|
|
Post by Toyhunter80's on Jul 27, 2010 19:00:13 GMT -5
I was thinking the same thing. Very nice build. I wish mine looked that good.
|
|
|
|
Post by midniterider on Jul 27, 2010 21:20:57 GMT -5
Thank you Ramz and Toyhunter. I just hope I can get my costume to the standards that you both and the other marines have set. I would not be at this point if not for you and other marines (Clonetroopers.net / 53rd FAC) that I was inspired and got helpful hints and ideas from your posts and WIP's. All of you have blazed the trail for new marines with this incredible website you have built and fine tuned over the years. Looking forward to completing this build and proudly serving along side my brothers!
|
|
|
|
Post by midniterider on Jul 27, 2010 21:23:21 GMT -5
PART 2SHOULDER BELLS   WEATHERED CHEST & BACK WEATHERED CHEST & BACK    
|
|
|
|
Post by RamZnation on Jul 28, 2010 14:18:16 GMT -5
Thank you Ramz and Toyhunter. I just hope I can get my costume to the standards that you both and the other marines have set. I would not be at this point if not for you and other marines (Clonetroopers.net / 53rd FAC) that I was inspired and got helpful hints and ideas from your posts and WIP's. All of you have blazed the trail for new marines with this incredible website you have built and fine tuned over the years. Looking forward to completing this build and proudly serving along side my brothers! Thanks for the kind words, and trust me...judging by your pictures...You are at the standard for the 53rd. I almost hate to say it but I think your GM looks better than mine. Can't wait to meet up with you in Orlando! |
|