Echo
Higher Junior Member

Posts: 84
|
Post by Echo on Sept 5, 2009 8:52:22 GMT -5
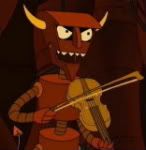
Look at the ridge along the bottom of the helmet. Im researching the to do the extended cowl and the cheek areas dont match up. So my question is, which one is correct? I thought that both the ILM images and the white GM were supposed to be the same... yet theres a minor difference. EDIT>> Larger image:  Attachments:
|
|
|
|
Post by il-matic (Lloyd M.) on Sept 7, 2009 5:17:27 GMT -5
I'd say go with the colored pictures, they look easier to do & they look like the other references we have that are available (Star Wars Insider Magazine pictures, the action figure & the GG Mini-Bust).
|
|
|
|
Post by RamZnation on Sept 7, 2009 23:14:52 GMT -5
As far as I know that ridge is still part of the GM even on the color image you just can't see it because of the of poor resolution on the Model sheet image. The cheeks look the same, it's the the perspective/angle of the image makes it look different.
|
|
|
|
Post by il-matic (Lloyd M.) on Sept 8, 2009 2:18:05 GMT -5
Oh yeah, check the screen shot/wallpaper over at CT.N It is like the colored ILM picture too.
|
|
Echo
Higher Junior Member
Posts: 84
|
Post by Echo on Sept 8, 2009 18:02:32 GMT -5
I think I made a confusing post lol. I know the ridge is there, but what I meant was WHERE it should actually go. look at the redone pic, I circled the bottom of the cheek area I was referring to... look at the red helm pics. See how the cheek piece that leads to the band that wraps around the helmet falls just under the helmet, while the white GM, it falls at the edge of the helmet. I believe youre right though IL, about the colored one being the actual movie accurate. However, they were both in a similiar stance, so I was just trying to ensure my design is correct.  |
|
|
|
Post by il-matic (Lloyd M.) on Sept 9, 2009 0:18:42 GMT -5
I don't think that top picture is as accurate as the bottom ones (I'm just going by what I have seen so far).
|
|
|
|
Post by RamZnation on Sept 9, 2009 13:44:44 GMT -5
The ridge appears to be on the same spot on both, it's just harder to see in the colored model sheet due to the poor resoultion on it. That ridge would be part of the face plate that goes under the Cowel. If you notice on my Sig box, the SGB stops at the nose which is why you can see the crease, just add on to it and the crease on the cowel will give you that ridge that you mentioned.
The top picture (The AO render) looks different from the colored Model sheet because the Helmet is lowered. If you were to raise it (The AO) up a bit it will match the color render.
|
|
Echo
Higher Junior Member
Posts: 84
|
Post by Echo on Sept 9, 2009 17:49:49 GMT -5
Ah! I hadnt even noticed it sat lower on the "AO". So, now that its all cleared up, what do you all think? Its going to be one piece, so now my question now is, should it sit lower like the AO version, giving it more of an aggressive stance? Although the ILM is accurate, no doubt, from what I have seen in other pics, it sits the same as the AO. I cant really tell from the pic in your sig Ram where it would land on the helmet(under or right on the brim).
Thanks you guys for being such a great help!
|
|
|
|
Post by RamZnation on Sept 9, 2009 18:03:25 GMT -5
My best guess would be to try out your WIP bucket and see how it fits. Once you have that done, you can determine how and where to set up the ridge piece. On my bucket, if you notice around the nose that is where the face plate ends (you can see the crease on the Cowl). This is the crease I was refering to on my bucket: 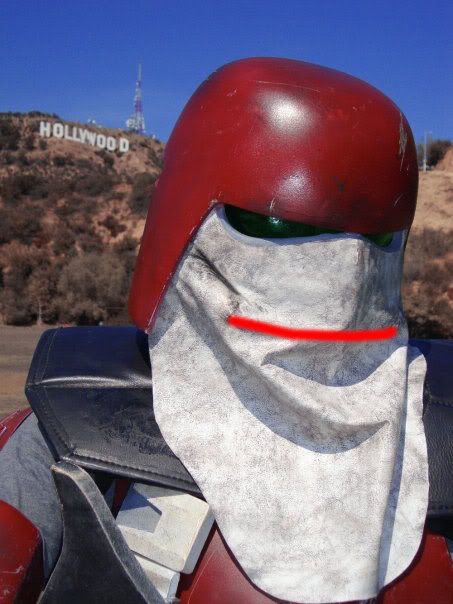 This is more or less where the Ridge would go: 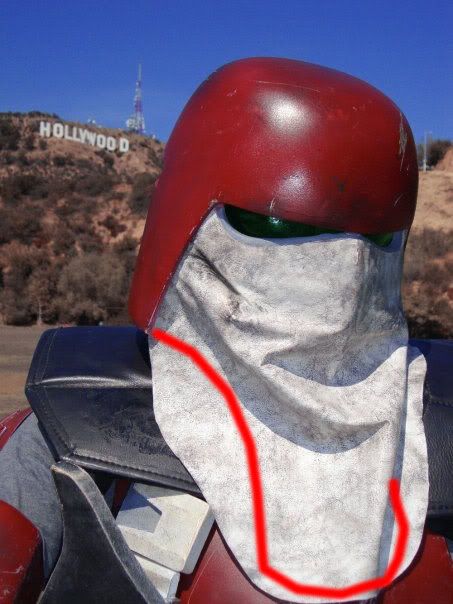 to give that ridge look, you will have to continue the face plate underneath just a little lower than what your cowl would be (I would say half to one inch maybe). Depending on your measurements that maybe one or two pieces (the front and back). This is what the SGB bucket looks like with out the Cowel: 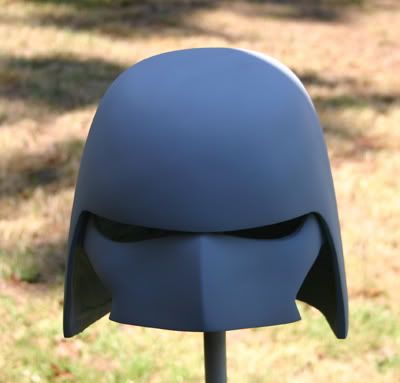 The Modification you want to do would be something like this:  That way when your cowel covers it, it will form a crease around that ridge. |
|
Echo
Higher Junior Member
Posts: 84
|
Post by Echo on Sept 10, 2009 16:44:20 GMT -5
Well you answered 2 questions in one post Ram! The ridge I was referring to was this one(wrapping around the helmet)  But the extended neck cover is absolutely amazing that youve shown. And it puts me in the right direction. And I would try on the helmet while building, but im molding it solid, so it wont actually sit on my head yet... |
|
|
|
Post by RamZnation on Sept 10, 2009 20:26:47 GMT -5
Always happy to help.
Make sure you adjust it to your Bucket and Cowel size. I exagerated on the one I did on my bucket as my Cowel is fairly long. Just remember that if it matches it should work. You might have to do a few tries before you get it to work just right.
|
|
|
|
Post by thedarkknight on Sept 10, 2009 21:59:09 GMT -5
thats how i plan on fixing jango jedi and my helmets when they show up! hope it works out ok. thanks ramz |
|
|
|
Post by il-matic (Lloyd M.) on Sept 10, 2009 23:35:06 GMT -5
That's not what I see, check these pictures out:   The helmet sort of flares out slightly from the cowl (it is not flush). |
|
|
|
Post by cjcr12 cesar on Jun 7, 2012 2:13:26 GMT -5
yes i see, you refer to the "step" that is seen at the bottom obehind the edge around at back... yes i dont matter with that detail, well that is my personal idea,but can be made using a strong wire all around and covering it with the white materialyou are using
|
|