|
|
Post by youngling on Feb 10, 2007 14:23:43 GMT -5
|
|
|
|
Post by youngling on Mar 9, 2007 20:05:38 GMT -5
Hey sorry for the lack of progress pics and stuff like that but my comp is being stupid and the memory card port won't work. So until I get that fixed I can't show you pics. But here is an update the helmet is ready for molding. I just have to make a few adjustments to the face plate and then it will be ready to molded and cast. I will post up progress pics and finished pics a soon as I can.
|
|
|
|
Post by mandoman on Mar 9, 2007 20:49:04 GMT -5
Sweet, can't wait to see those pics! Definatly take pics of the molding process as well!
|
|
|
|
Post by youngling on Mar 13, 2007 15:11:56 GMT -5
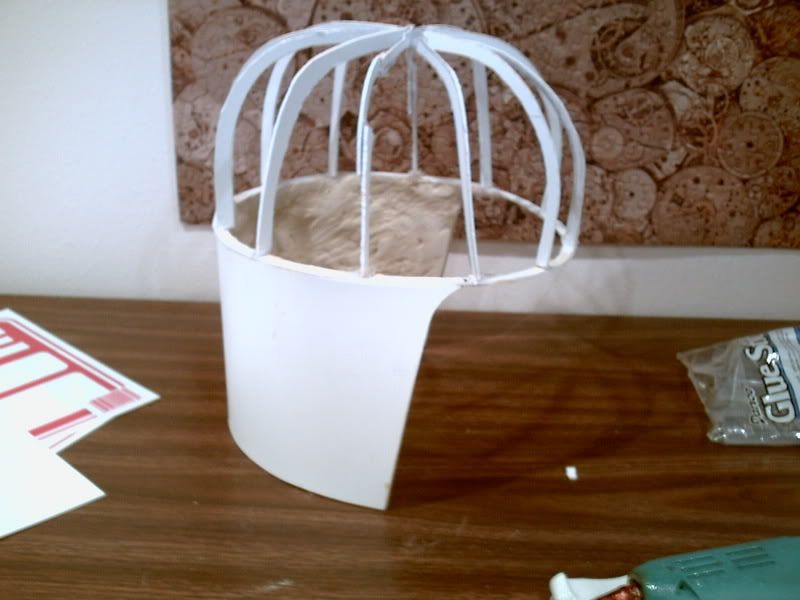
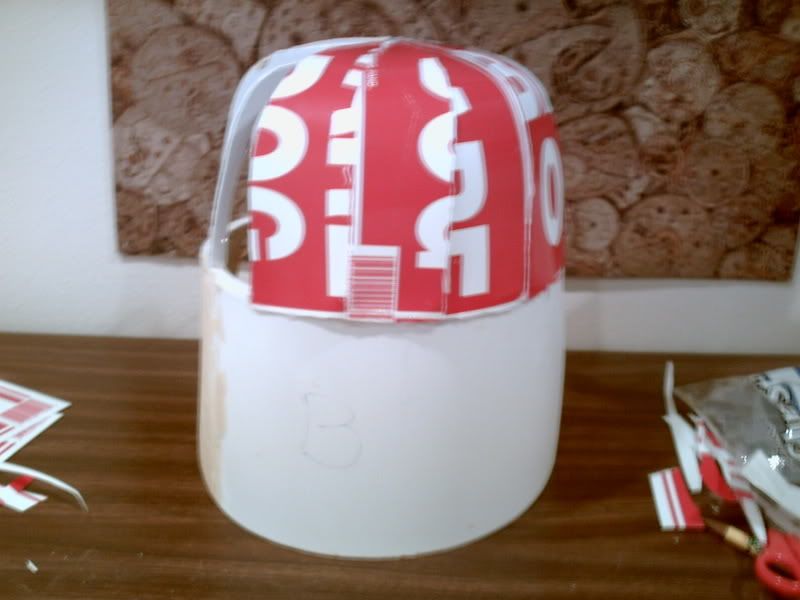
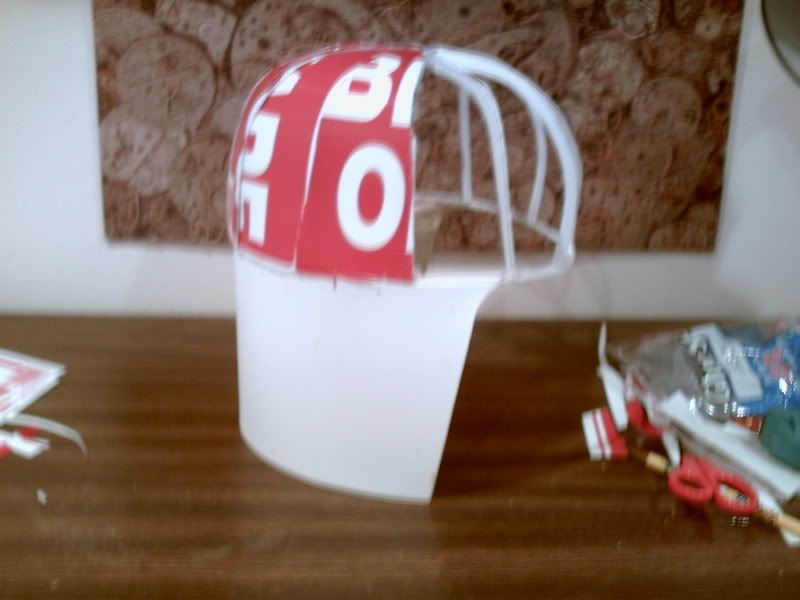
Allright I finally got my lazy but up and fixed the comp. Here are progress pics of the making of my helmet. TOP  BACK 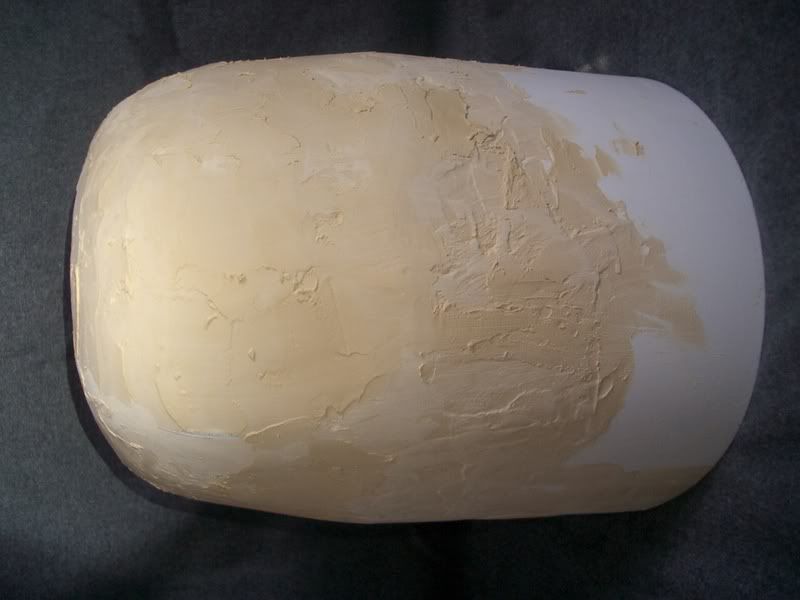 SIDE  FRONT 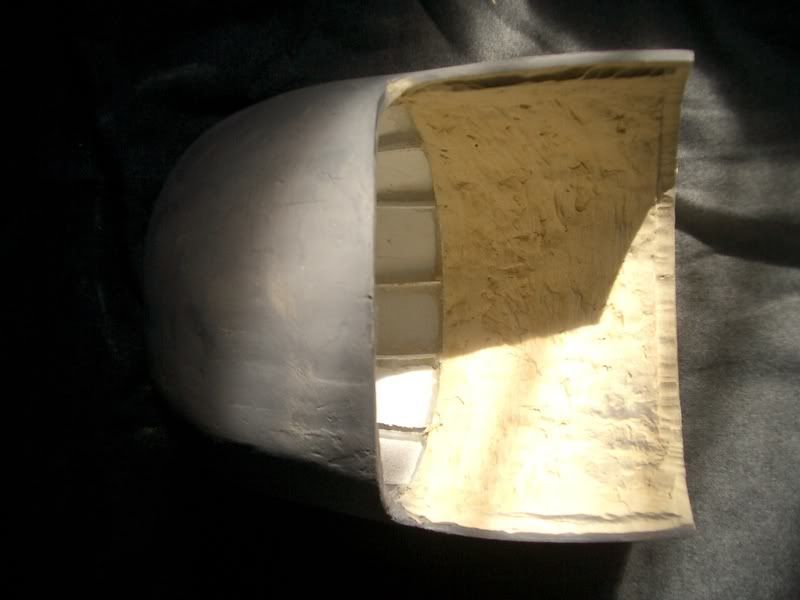 Now here are some faceplate pics FRONT 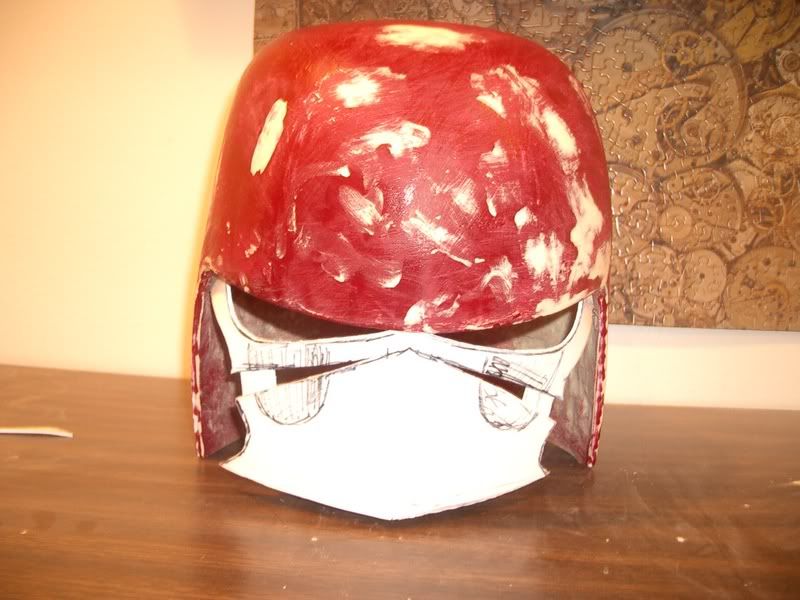 SIDE 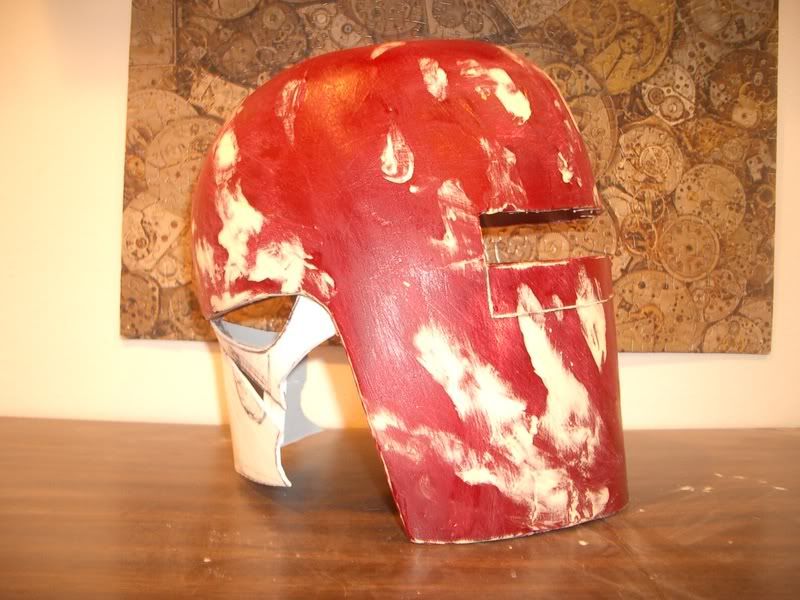 I want to know if any of you can point out my mistake on the helmet (which I fixed as you can see in the finished pics) But give it a shot tell me what you think my mistake was. FRONT (looking up) 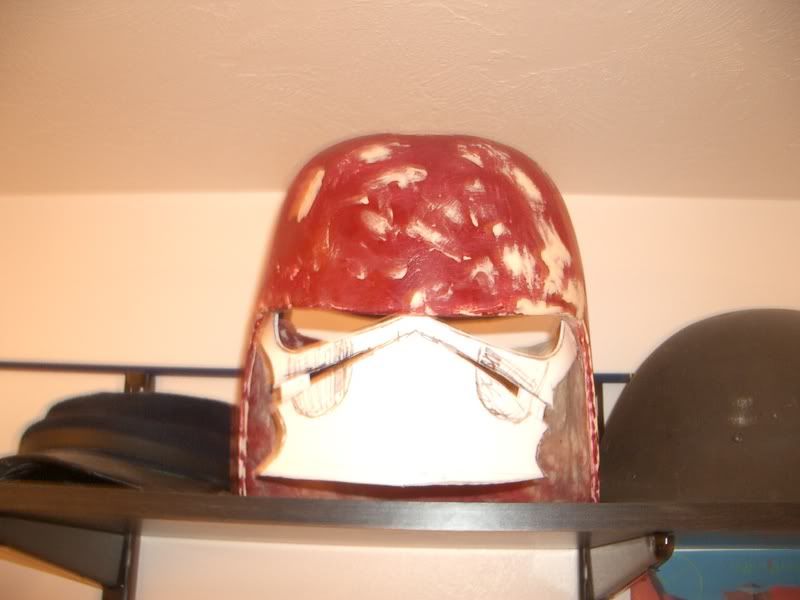 Now the took today 5 min ago pics FRONT 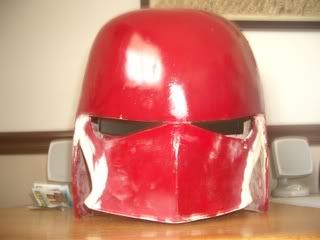 SIDE 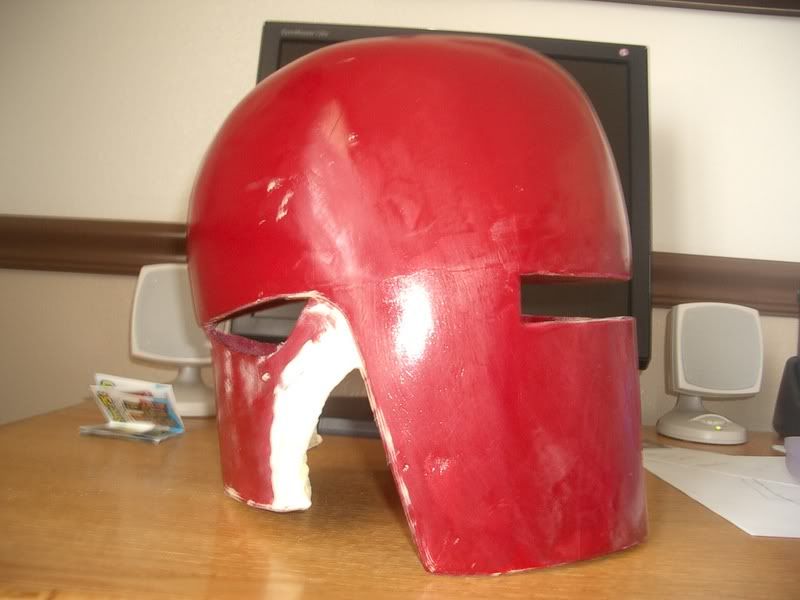 BACK 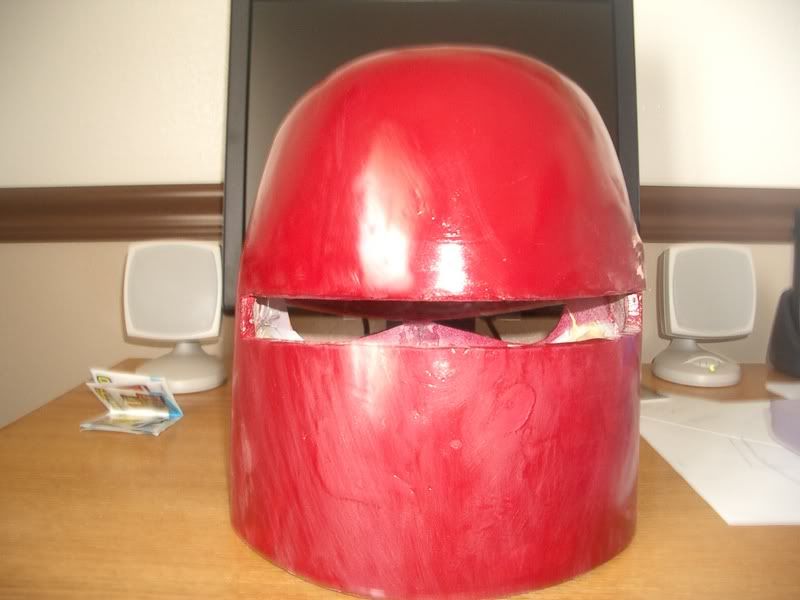 here is a pic of the one thing that I CANNOT fix on the mold that will have to be sanded of the actually helmet when it is cast 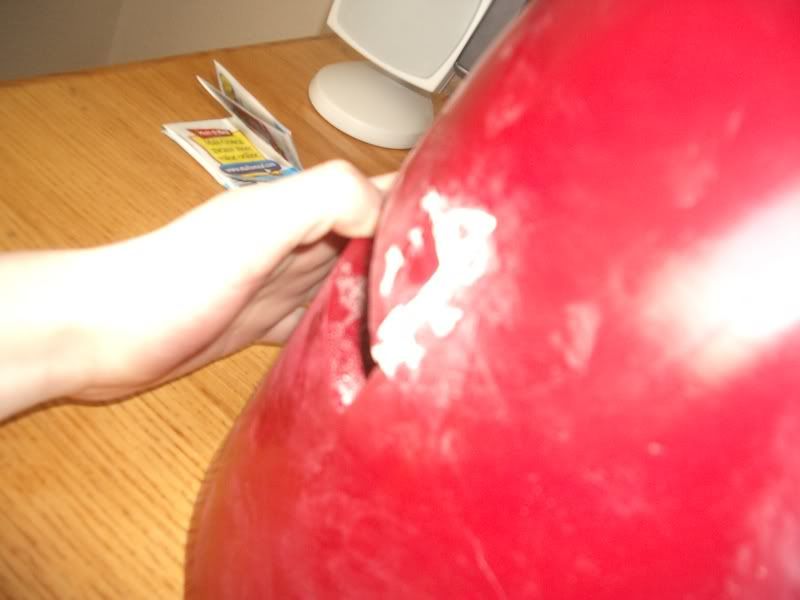 Now last but not least a comparison of my helmet and the SGB 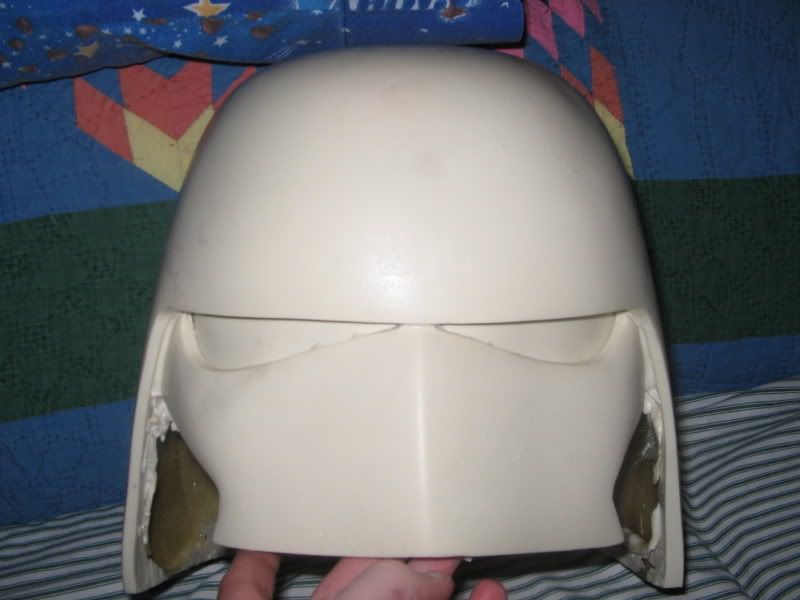 I hope you enjoy! Oh and do leave comments. |
|
Deleted
Deleted Member
Posts: 0
|
Post by Deleted on Mar 13, 2007 15:57:43 GMT -5
Hey preston that looks great. Homemade stuff rocks and your's is kicking ass! GREAT JOB!
|
|
|
|
Post by youngling on Mar 13, 2007 16:40:31 GMT -5
Thanks I really have worked hard long hours on it and I can't wait till I make my first cast. And like you said I love making things the homemade way. I don't like to just buy someone elses stuff and put it together it just doesn't feel like "I made it" ya know what I mean? I love to vac form my very own peices and all that.
Also Mike do you need some more detailed pics of the helmet to help me make my mold? Or will these pics be enough?
Once again thanks for the kind words.
|
|
|
|
Post by Socker on Mar 13, 2007 16:57:48 GMT -5
Is really good, personally I like the result  I want one jeje some help plis  |
|
|
|
Post by snowflake on Mar 13, 2007 17:57:11 GMT -5
nice work! it's amazing how you did the shape of the dome, very smooth! One thing i don't like: i believe the angle of the "neck guard" or "shirt" or "idon'tknowhowtocallit" part of the hlemet should be more open. The way you did it almost resemble a vertical line (just like the SGB, which i don't like for this matter), while i think it should be more "vader-like". I hope i could make myself clear, english is not my language... in addition i just came from a dinner at a very good restaurant in Rome and my belly is full of superbly cooked fish and an entire bottle of very nice white wine from Sardinia! |
|
|
|
Post by pghfett on Mar 13, 2007 19:21:34 GMT -5
Thanks I really have worked hard long hours on it and I can't wait till I make my first cast. And like you said I love making things the homemade way. I don't like to just buy someone elses stuff and put it together it just doesn't feel like "I made it" ya know what I mean? I love to vac form my very own peices and all that. Also Mike do you need some more detailed pics of the helmet to help me make my mold? Or will these pics be enough? Once again thanks for the kind words. Excellent work - I too obviously make my own stuff for the most part, it's very rewarding and i have tremendous respect for folks who scratch build items. At any rate, drop me a pm about molding that sucker up if you want it would be a snap given the shape of the bucket and a nice starter mold for ya. Once again - great job !!!  |
|
|
|
Post by youngling on Mar 14, 2007 18:02:15 GMT -5
Hey once again thanks for the kind words I really do apprieciate them. I really put a ton of work into this. And Mike thanks for the help too I really apprieciate that. As far as Snowflakes comment goes. I do see a point in your suggestion/comment. The helmet goes out a about and inch maybe inch and a half at the bottom. But this helmet is made to how I like it. Infact if you noticed I didn't even put a correct face plate in there even though we have better references that show mine is wrong. I just simply like the look of the sharp middle part. But anyways here is the sith snapshot showing how snowflake is right but at the same time it isn't quite like a vader helmet. 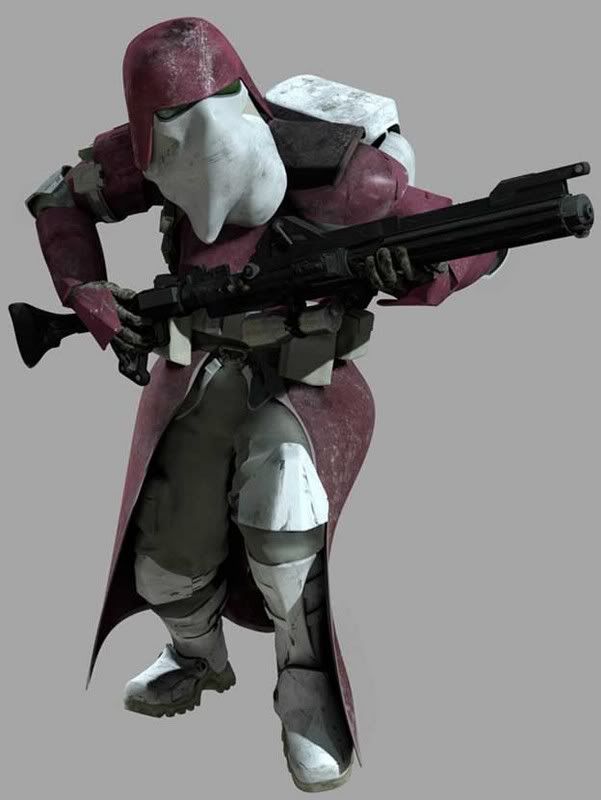 |
|
|
|
Post by snowflake on Mar 14, 2007 20:37:55 GMT -5
i totally agree with making the helmet to how you like it, that's the same thing i'm doing for mine (the dome of my helmet is almost spherical like Bacara's, while it should be more squared, just like a TK's helmet).
|
|
|
|
Post by mazingerj on Mar 28, 2007 17:48:10 GMT -5
Hello I am charmed with your helmet a really fantastic work, I want your son or if you do a mold of the helmet already you have buyer.
|
|
|
|
Post by youngling on Apr 12, 2007 20:52:47 GMT -5
Alright Guys ordered my rubber 2 days ago it should be here shortly and then I will be getting some ROTO to be making the final peice be expecting pics of the molding process.
|
|
|
|
Post by Hopps on Apr 13, 2007 3:17:21 GMT -5
Alright Guys ordered my rubber 2 days ago it should be here shortly and then I will be getting some ROTO to be making the final peice be expecting pics of the molding process. wow can´t wait to see them |
|
|
|
Post by youngling on Apr 23, 2007 19:09:04 GMT -5
Allright first layer of rubber is on in about 50 min I will be out putting on the second layer I will also post pics of that. I know Mandoman or mayber it was Jason (shadow) who wanted pics of the molding process. Alright first of all I will explain the process. The First step is to take a release agent and spray it all over the helmet. When you do this you need to spray a TON on there do not go sparingly!!!! I cannot emphasize this enough. If you do not spray enough the rubber will stick to the helmet or whatever it is you are casting and will rip when you try to peel it off. Anyways wait for about 10 minutes and then take a brush and kind of brush the release agent on the helmet then mist the helmet lightly just to make sure. 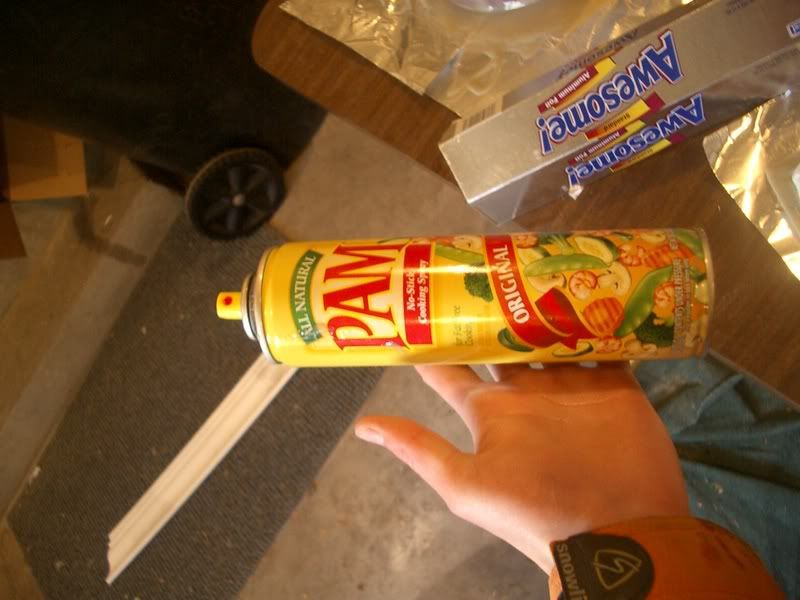 Step Two is take you rubber which comes as a 2 part mixture and mix part A and part B together in equal amounts mix it slowly but not too slowly you do not want air bubbles in your rubber otherwise it will show up in the final cast peice. 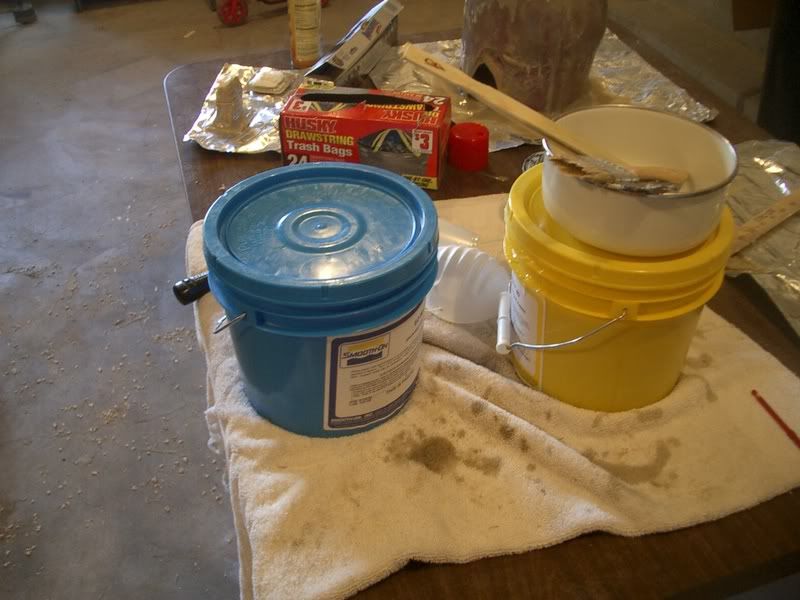 Step Three is to take the mixed rubber and kind of pour it on top of the helmet and then take you brush and brush it around the important details eyes, mouth, vent, etc. then make sure it gets on all parts of the helemt. Eventually the rubber will start to solidify and be hard to brush around at this point stop and look at the helmet and make sure it is covered in a good amount of rubber EVERYWHERE!!!! If e everything is not covered mix up some more and repeat the above steps till everything is covered. Step Four go sit on your lazy butt and take pics for all of us to see then explain what you did to other people on the forums. 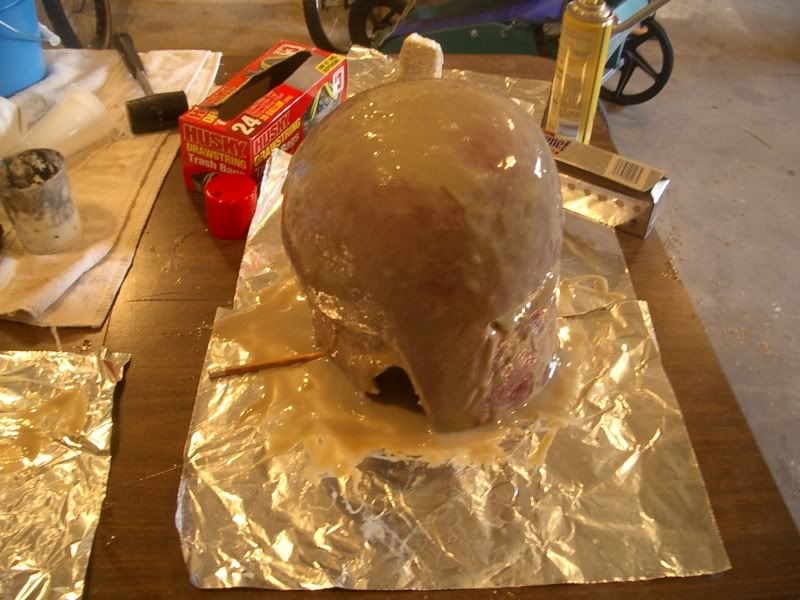 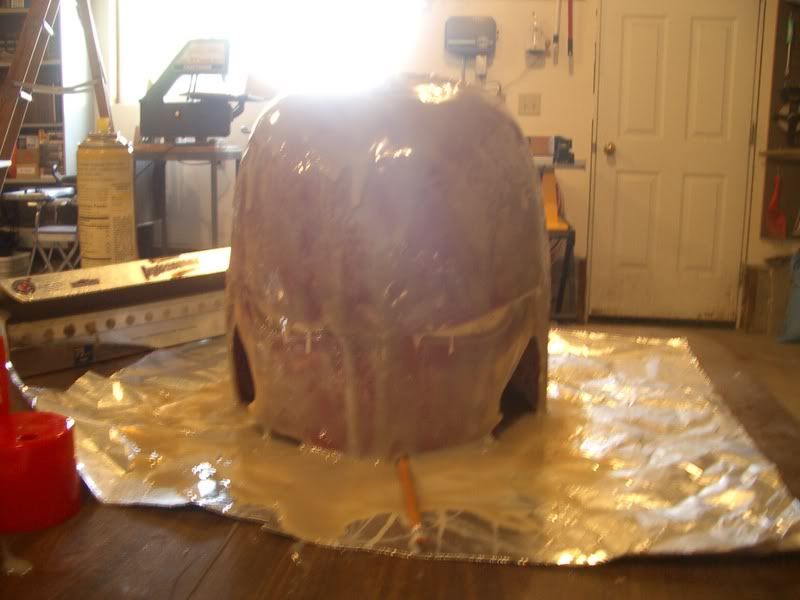 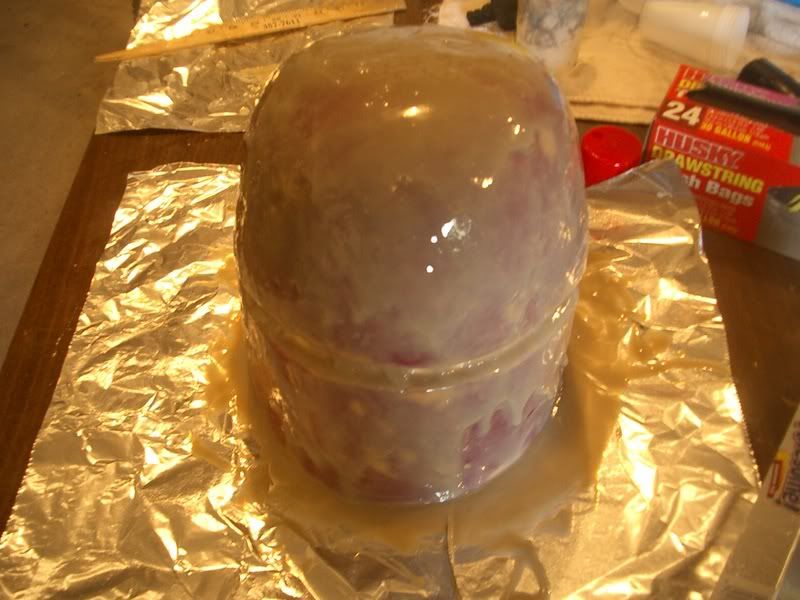 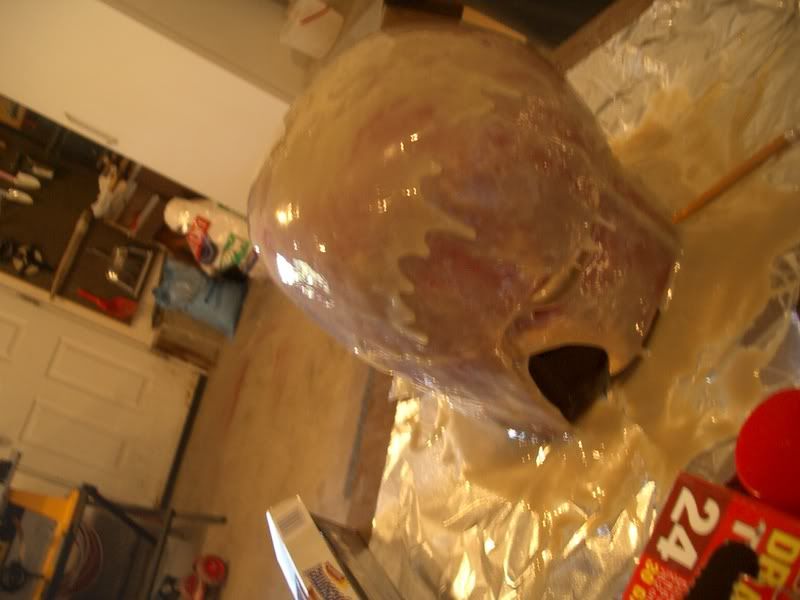 Well leave feedback. I will have pics of layer 2 and layer 3 and mayber even layer 4. |
|